Infiniti M35/M45 Y50. Manual - part 751
DOOR FINISHER
EI-35
C
D
E
F
G
H
J
K
L
M
A
B
EI
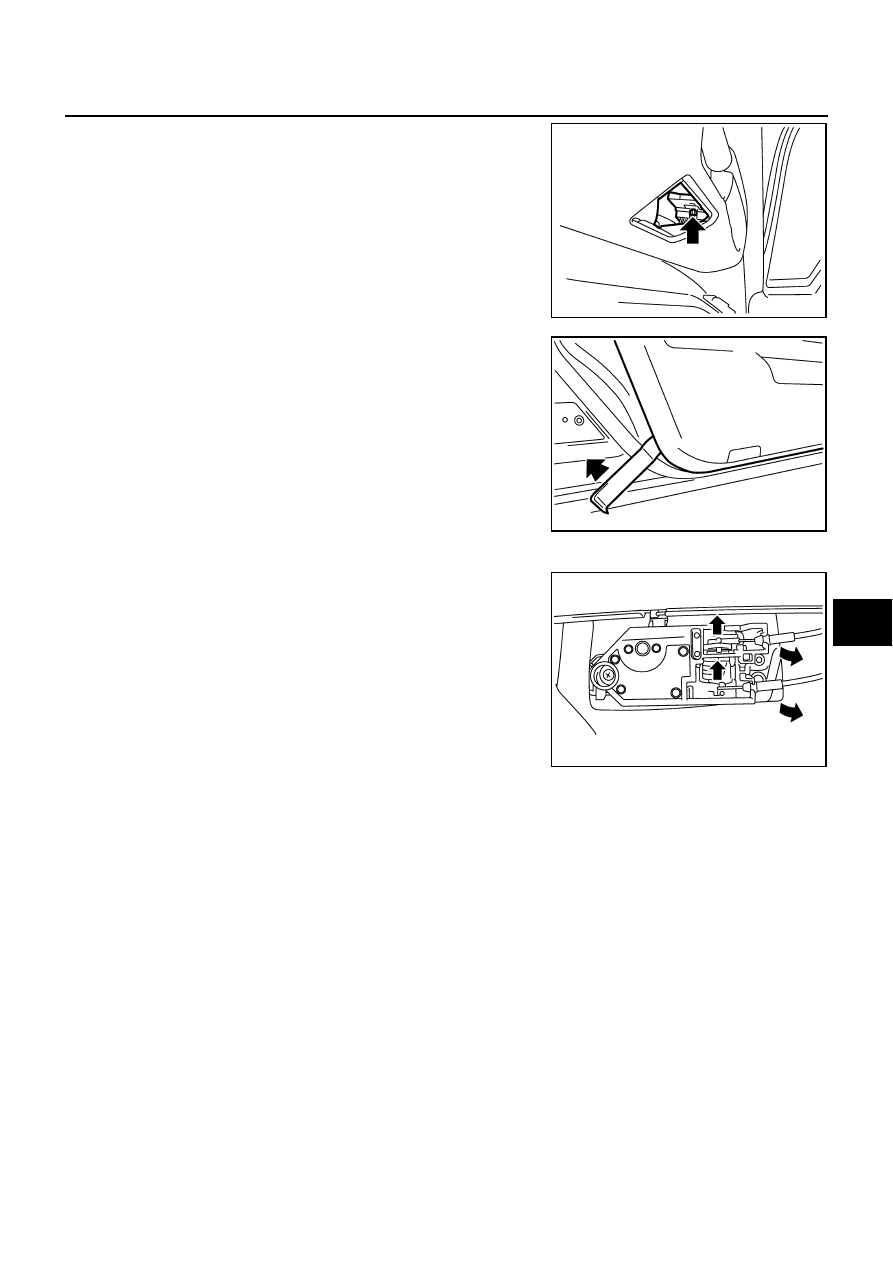
5.
Insert a thin screwdriver from the armrest finisher opening and
lift the lock of the power window switch harness connector.
6.
Insert a clip clamp remover into clips on back door finisher, and
disengage clips.
CAUTION:
Insert a clip clamp remover into the part shown by the
arrow (between the clips and the body side panel). Remove
door finisher.
7.
Disconnect harness connector for step lamp.
8.
Pull up door finisher and pull out toward vehicle inside, and then
disconnect inside handle cable and lock knob cable from back
door finisher.
9.
Disconnect harness connector for power window switch, seat memory switch.
10. Remove door finisher.
11. Remove the following parts after removing door finisher.
●
Inside handle assembly
●
Armrest
●
Seat memory switch
●
Power window switch
●
Step lamp
Installation
Install in the reverse order of removal.
CAUTION:
When installing door finisher, make sure that clips are securely fitted in panel holes on body, and then
press them in.
PIIB4936E
PIIB4932E
PIIB4933E