Infiniti M35/M45 Y50. Manual - part 750


  Index      Infiniti     Infiniti M35/M45 Y50 - service repair manual 2007 year


Search            copyright infringement  


Content   ..  748  749  750  751   ..


Infiniti M35/M45 Y50. Manual - part 750


SIDE GUARD MOLDING

EI-31

C

D

E

F

G

H

J

K

L

M

A

B

EI

SIDE GUARD MOLDING

PFP:76840

Removal and Installation

NIS0024R

REMOVAL

1.

Apply masking tape around outer circumference of side guard molding. 

2.

Remove double-faced adhesive tapes with (wide) resin spatula. Disengage clips and remove side guard
molding (front / rear). 

INSTALLATION

1.

Remove double-faced adhesive tape remaining on vehicle.

2.

Clean contact surface of vehicle (to side guard molding), and install side guard molding to specified holes. 

NOTE:
To re-use side guard molding, follow above steps 1 and 2 as well; clean surface after removing double-
faced adhesive tape, apply new double-faced adhesive tape and then install side guard molding to vehi-
cle. 

CAUTION:

Do not let air between contact surfaces when installing. 

To secure contact, do not wash vehicle within 24 hours after installation.
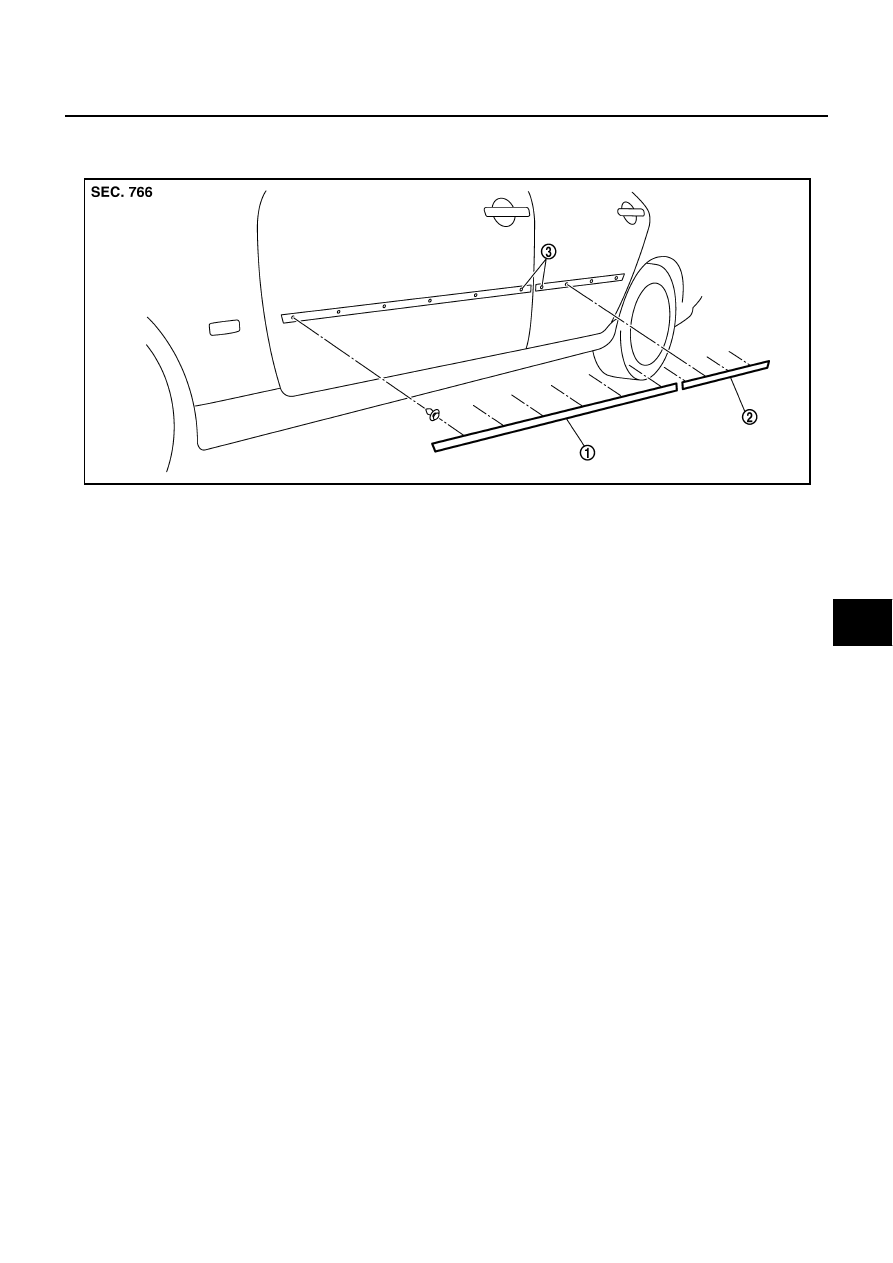
1.

Side guard molding (front)

2.

Side guard molding (rear)

3.

Specified holes

PIIB2937J

EI-32

DOOR PARTING SEAL

DOOR PARTING SEAL

PFP:80838

Removal and Installation

NIS0024S

FRONT DOOR PARTING SEAL
Removal

1.

Fully open front door.

2.

Remove front door parting seal (front side) mounting plastic clips.

3.

Disengage the joint between front door parting seal (front side) and front door panel, and then remove
front door parting seal (front side).

4.

Disengage front door parting seal (lower side) mounting plastic clips, and then remove front door parting
seal (lower side).

Installation

Install in the reverse order of removal. 

REAR DOOR PARTING SEAL
Removal

1.

Fully open rear door.

2.

Disengage the joint between rear door parting seal (front side) and rear door panel, and then remove rear
door parting seal (front side).

3.

Disengage rear door parting seal (lower side) mounting plastic clips, and then remove rear door parting
seal (lower side).

Installation

Install in the reverse order of removal.

1.

Front door parting seal (front side)

2.

Front door parting seal (lower side)

3.

Rear door parting seal (lower side)

4.

Rear door parting seal (front side)

5.

Door inner panel

PIIB3974J

TRUNK LID FINISHER

EI-33

C

D

E

F

G

H

J

K

L

M

A

B

EI

TRUNK LID FINISHER

PFP:84810

Removal and Installation

NIS0024T

REMOVAL

1.

Fully open trunk lid.

2.

Remove trunk lid finisher inner. Refer to 

EI-57, "REMOVAL AND INSTALLATION OF TRUNK LID FIN-

ISHER INNER"

 .

3.

Remove trunk lid finisher upper mounting nuts. 

4.

Disconnect back lamp, license lamp and trunk opener switch harness connector.

5.

Remove double-faced adhesive tapes with (wide) plastic spatula.Disconnect clips and remove trunk lid
finisher outer.

INSTALLATION

Install in the reverse order of removal.

CAUTION:

Replace double-faced adhesive tape on back of finisher with a new tape if trunk lid finisher outer is
reused.

Remove double-faced adhesive tape remaining on body and back of finisher using double-faced
adhesive tape remover when removing finisher outer.

Install after cleaning adhesive parts of body side and back of finisher outer.

Do not wash the vehicle with in 24 hours after installing so as to keep adhesive.

1.

Trunk lid finisher outer

PIIB4516E

EI-34

DOOR FINISHER

DOOR FINISHER

PFP:80900

Removal and Installation

NIS0024U

FRONT AND REAR DOOR FINISHER
Removal

1.

Fully open door window.

2.

Remove inside handle escutcheon and remove screw.

3.

Remove arm rest finisher.

4.

Remove screw of armrest finisher portion.

1.

Inside handle escutcheon

2.

Armrest finisher

3.

Front door finisher

4.

Rear door finisher

5.

Step lamp

6.

Seat memory switch

7.

Front door sash cover inner 

8.

Rear door sash cover inner

Clip

Metal clip

PIIB4931E


Content   ..  748  749  750  751   ..