Index Infiniti Infiniti I35 (A33) - service repair manual 2004 year
Search
Content .. 568 569 570 571 ..
Infiniti I35 (A33). Manual - part 570
SRS879
GI
MA
EM
LC
EC
FE
AT
AX
SU
BR
ST
BT
HA
SC
EL
IDX
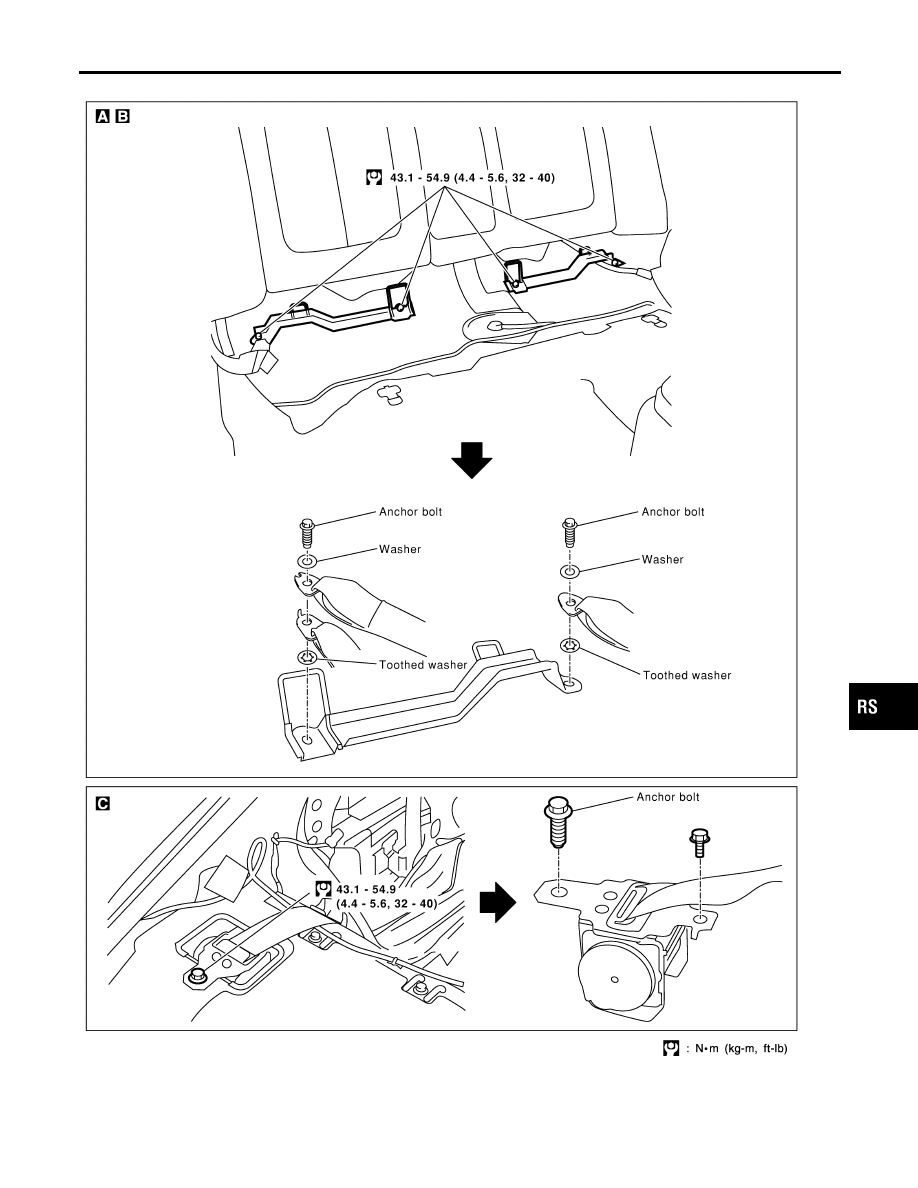
SEAT BELTS
Rear Seat Belt (Cont’d)
RS-7