Infiniti G37 Coupe. Manual - part 820
DOOR FINISHER
INT-11
< ON-VEHICLE REPAIR >
C
D
E
F
G
H
I
K
L
M
A
B
INT
N
O
P
ON-VEHICLE REPAIR
DOOR FINISHER
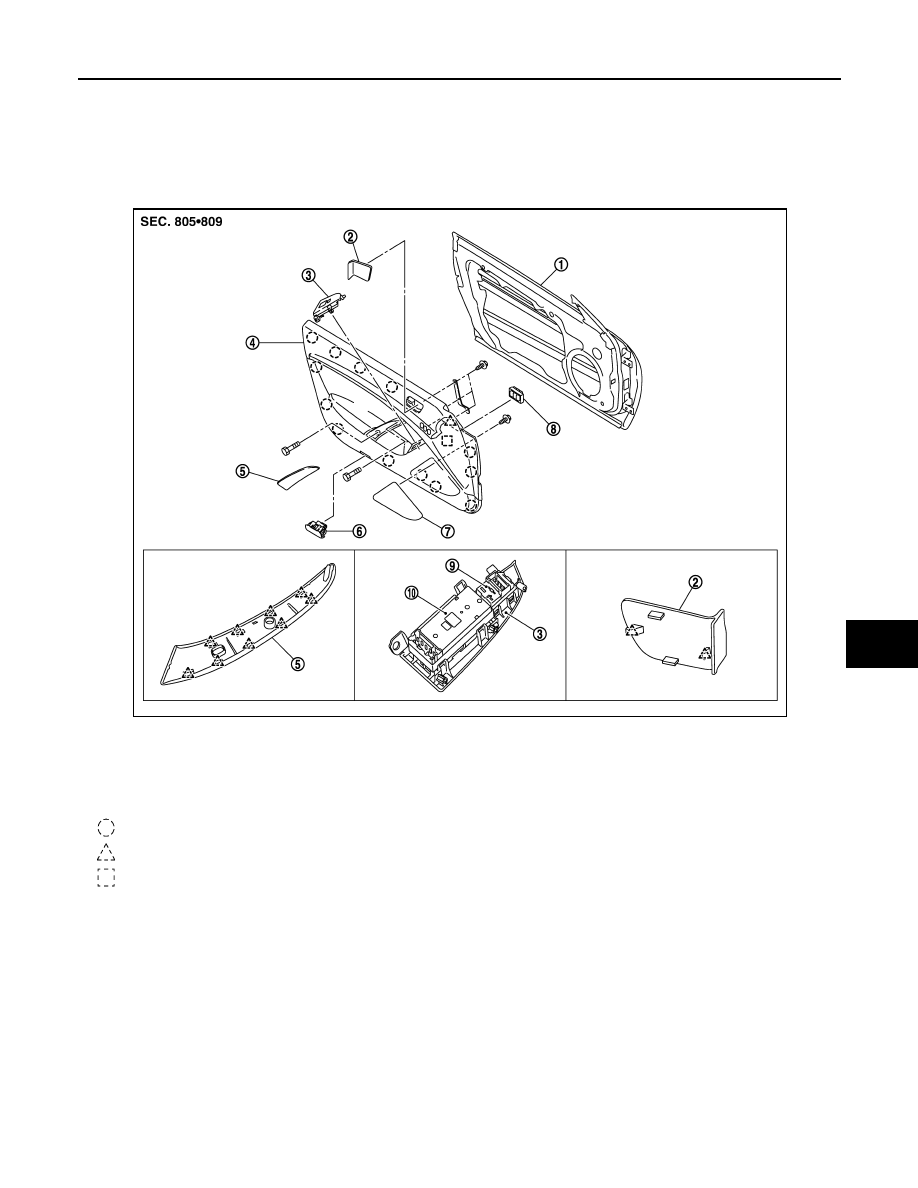
Exploded View
INFOID:0000000001722841
Removal and Installation
INFOID:0000000001722842
REMOVAL
1.
Fully open door window.
1.
Door panel assembly
2.
Inside handle escutcheon
3.
Power window switch finisher
4.
Door finisher assembly
5.
Armrest cap
6.
Step lamp
7.
Speaker grille
8.
Seat memory switch
9.
Mirror control switch
10. Power window switch
: Clip
: Pawl
: Metal clip
JMJIA0956ZZ