Infiniti G35 (V35) Sedan. Manual - part 755
HA-54
< ON-VEHICLE REPAIR >
CONDENSER PIPE ASSEMBLY
CONDENSER PIPE ASSEMBLY
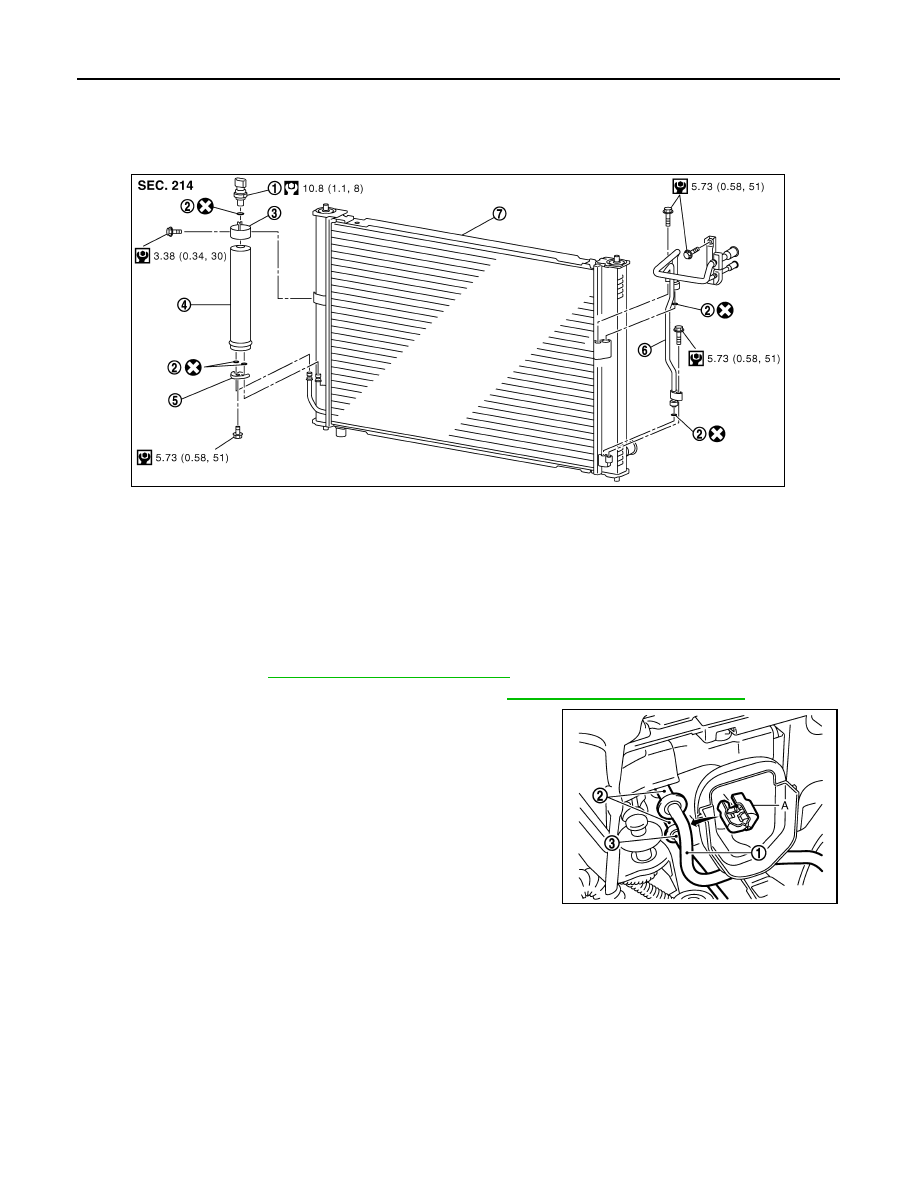
Exploded View
INFOID:0000000000959882
Removal and Installation
INFOID:0000000000959883
REMOVAL
1.
Use a refrigerant collecting equipment (for HFC-134a) to discharge the refrigerant.
2.
Remove front bumper.
EXT-11, "Removal and Installation"
.
3.
Remove air cleaner case (LH) and air duct (LH). Refer to
EM-25, "Removal and Installation"
4.
Disconnect the one-touch joint between high-pressure flexible
hose (1) and condenser pipe assembly (2) with disconnector (A)
(SST: 9253089912).
CAUTION:
Cap or wrap the joint of high-pressure flexible hose and
condenser pipe assembly with suitable material such as
vinyl tape to avoid the entry of air.
5.
Disconnect the one-touch joints between high-pressure pipe 1
(3) and condenser pipe assembly with disconnector (A) (SST:
9253089908).
CAUTION:
Cap or wrap the joint of high-pressure pipe 1 and con-
denser pipe assembly with suitable material such as vinyl tape to avoid the entry of air.
1.
Refrigerant pressure sensor
2.
O-ring
3.
Liquid tank bracket
4.
Liquid tank
5.
Bracket
6.
Condenser pipe assembly
7.
Radiator & condenser assembly
JSIIA0012GB
JSIIA0095ZZ