Infiniti FX35 / FX45. Manual - part 904


  Index      Infiniti     Infiniti FX35 / FX45 (S50) - service repair manual 2008 year


Search            


Content   ..  902  903  904  905   ..


Infiniti FX35 / FX45. Manual - part 904


SC-4

< SERVICE INFORMATION >

BATTERY

BATTERY

How to Handle Battery

INFOID:0000000001328243

CAUTION:

• If it becomes necessary to start the engine with a booster battery and jumper cables, use a 12-volt

booster battery.

• After connecting battery cables, ensure that they are tightly clamped to battery terminals for good

contact.

METHODS OF PREVENTING OVER-DISCHARGE

The following precautions must be taken to prevent over-discharging
a battery.
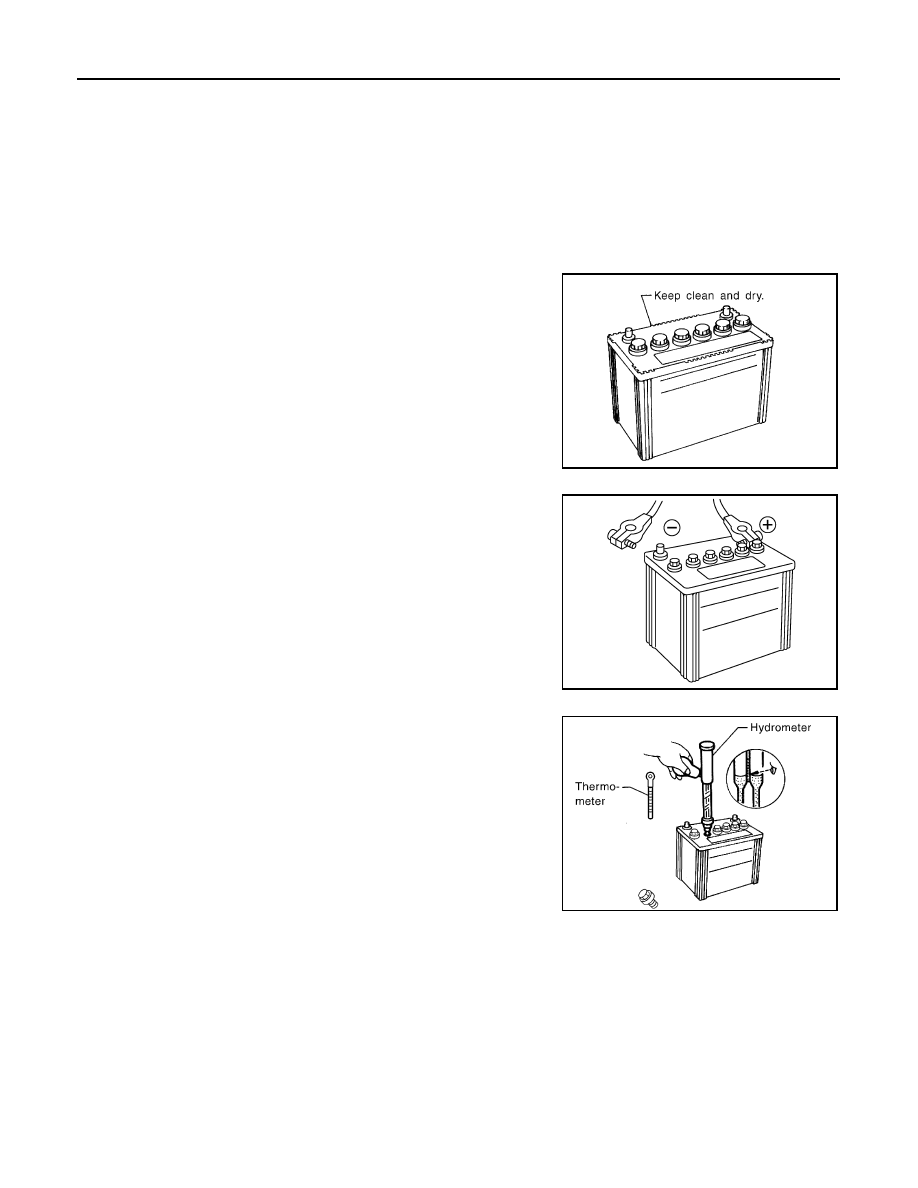
• The battery surface (particularly its top) should always be kept

clean and dry.

• The terminal connections should be clean and tight.
• At every routine maintenance, check the electrolyte level.

This also applies to batteries designated as “low maintenance” and
“maintenance-free”.

• When the vehicle is not going to be used over a long period of

time, disconnect the battery cable from the negative terminal.

• Check the charge condition of the battery.

Periodically check the specific gravity of the electrolyte. Keep a
close check on charge condition to prevent over-discharge.

CHECKING ELECTROLYTE LEVEL

WARNING:

Never allow battery fluid to come in contact with skin, eyes, fabrics, or painted surfaces. After touch-
ing a battery, never touch or rub your eyes until you have thoroughly washed your hands. If acid con-
tacts eyes, skin or clothing, immediately flush with water for 15 minutes and seek medical attention.

MEL040F

ELA0349D

MEL042F

BATTERY

SC-5

< SERVICE INFORMATION >

C

D

E

F

G

H

I

J

L

M

A

B

SC

N

O

P

• Remove the cell plug using a suitable tool.
• Add distilled water up to the MAX level.

Sulphation

A battery will be completely discharged if it is left unattended
for a long time and the specific gravity will become less than
1.100. This may result in sulphation on the cell plates.
To determine if a battery has been “sulphated”, note its voltage
and current when charging it. As shown in the figure, less cur-
rent and higher voltage are observed in the initial stage of
charging sulphated batteries.
A sulphated battery may sometimes be brought back into ser-
vice by means of a long, slow charge, 12 hours or more, fol-
lowed by a battery capacity test.

SPECIFIC GRAVITY CHECK

1.

Read hydrometer and thermometer indications at eye level.

2.

Use the chart below to correct your hydrometer reading accord-
ing to electrolyte temperature.

Hydrometer Temperature Correction

MEL043F

PKIA2353E

MEL042FA

Battery electrolyte temperature 

°

C (

°

F)

Add to specific gravity reading

71 (160)

0.032

66 (150)

0.028

60 (140)

0.024

54 (130)

0.020

49 (120)

0.016

43 (110)

0.012

38 (100)

0.008

32 (90)

0.004

27 (80)

0

21 (70)

0.004

16 (60)

0.008

10 (50)

0.012

4 (40)

0.016

1 (30)

0.020

SC-6

< SERVICE INFORMATION >

BATTERY

CHARGING THE BATTERY

CAUTION:

• Never “quick charge” a fully discharged battery.
• Keep the battery away from open flame while it is being charged.
• When connecting the charger, connect the leads first, then turn on the charger. Never turn on the

charger first, as this may cause a spark.

• If battery electrolyte temperature rises above 55

°

C (131

°

F), stop charging. Always charge battery at a

temperature below 55

°

C (131

°

F).

Charging Rates

Never charge at more than 50 ampere rate.
NOTE:
The ammeter reading on your battery charger will automatically decrease as the battery charges. This indi-
cates that the voltage of the battery is increasing normally as the state of charge improves. The charging amps
indicated above refer to initial charge rate.
• If, after charging, the specific gravity of any two cells varies more than 0.050, the battery should be replaced.

Trouble Diagnosis with Battery Service Center

INFOID:0000000001328244

For battery testing, use Battery Service Center (J-48087). For details and operating instructions, refer to Tech-
nical Service Bulletin and/or Battery Service Center User Guide.

Removal and Installation

INFOID:0000000001328245

REMOVAL

1.

Remove hoodledge cover (RH).

7 (20)

0.024

12 (10)

0.028

18 (0)

0.032

Corrected specific gravity

Approximate charge condition

1.260 - 1.280

Fully charged

1.230 - 1.250

3/4 charged

1.200 - 1.220

1/2 charged

1.170 - 1.190

1/4 charged

1.140 - 1.160

Almost discharged

1.110 - 1.130

Completely discharged

Battery electrolyte temperature 

°

C (

°

F)

Add to specific gravity reading

Amp

Time

50

1 hour

25

2 hours

10

5 hours

5

10 hours

PKIA2805E

BATTERY

SC-7

< SERVICE INFORMATION >

C

D

E

F

G

H

I

J

L

M

A

B

SC

N

O

P

2.

Remove cowl top cover (RH). Refer to 

EI-23, "Removal and Installation"


3.

Disconnect both battery cables from terminals.

CAUTION:

When disconnecting, disconnect the battery cable from the
negative terminal first.

4.

Remove battery fix frame mounting nuts and battery fix frame.

5.

Remove battery.

INSTALLATION

Installation is the reverse order of removal.

CAUTION:

When connecting, connect the battery cable to the positive terminal first.

PKIA2806E

Battery fix frame mounting nut

: 3.9 N·m (0.4 kg-m, 35 in-lb)

Battery terminal nut

: 5.4 N·m (0.55 kg-m, 48 in-lb)


Content   ..  902  903  904  905   ..