Infiniti FX35, FX50 (S51). Manual - part 939
EM-56
< REMOVAL AND INSTALLATION >
[VQ35HR]
TIMING CHAIN
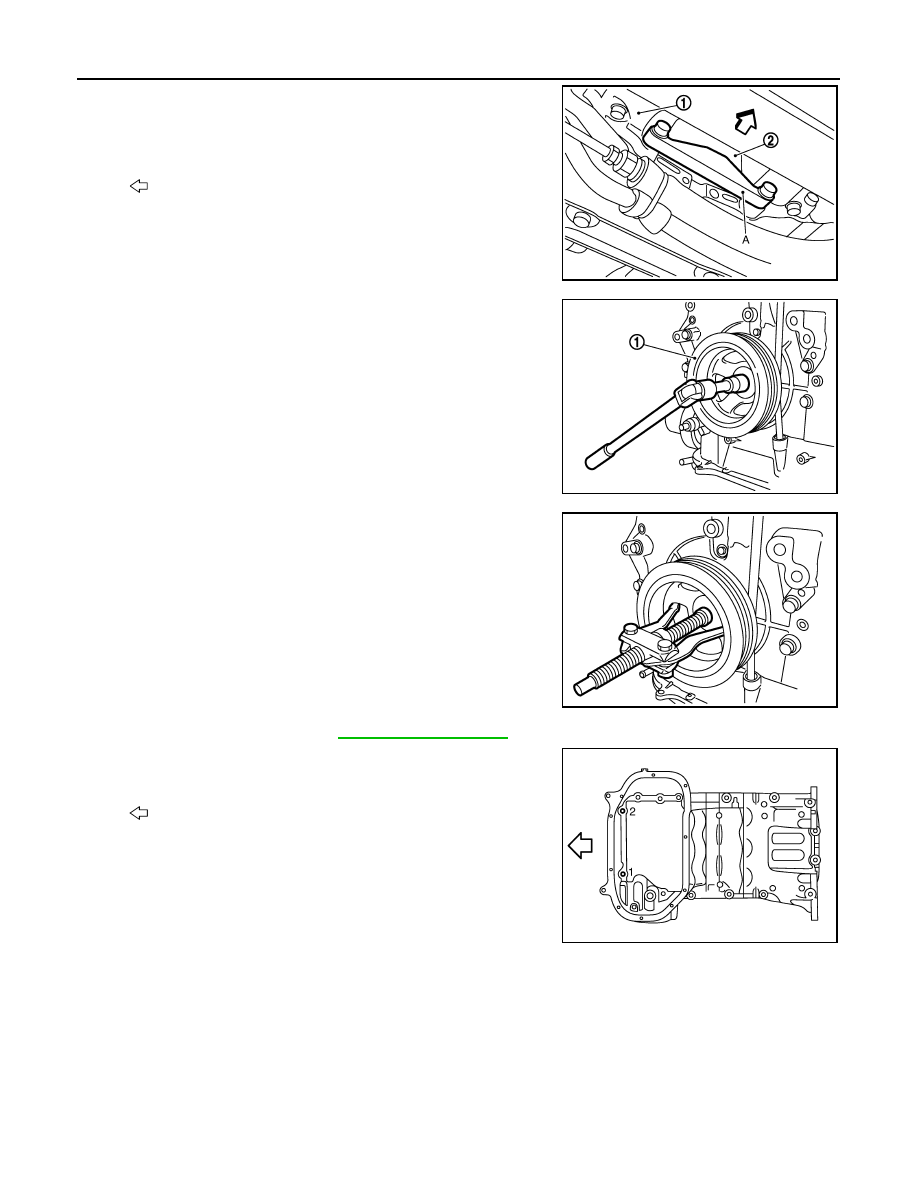
c.
Remove rear cover plate and set the ring gear stopper [SST:
KV10118600 (J-48641)] (A) as shown in the figure.
d.
Loosen crankshaft pulley bolt and rotate bolt seating surface at
10 mm (0.39 in) from its original position.
CAUTION:
Never remove crankshaft pulley bolt as it will be used as a
supporting point for suitable puller.
e.
Place suitable puller tab on holes of crankshaft pulley, and pull
crankshaft pulley through.
CAUTION:
Never put suitable puller tab on crankshaft pulley periphery,
as this will damage internal damper.
26. Remove oil pan (lower). Refer to
27. Loosen two mounting bolts in front of oil pan (upper) with power
tool in reverse order as shown in the figure.
28. Remove front timing chain case as per the following:
1
: Oil pan (upper)
2
: Drive plate
: Vehicle front
JPBIA0408ZZ
1
: Crankshaft pulley
JPBIA1364ZZ
JPBIA1368ZZ
: Engine front
JPBIA0047ZZ