Content .. 1756 1757 1758 1759 ..
Infiniti FX35, FX50 (S51). Manual - part 1758
ST-24
< REMOVAL AND INSTALLATION >
LOWER SHAFT
LOWER SHAFT
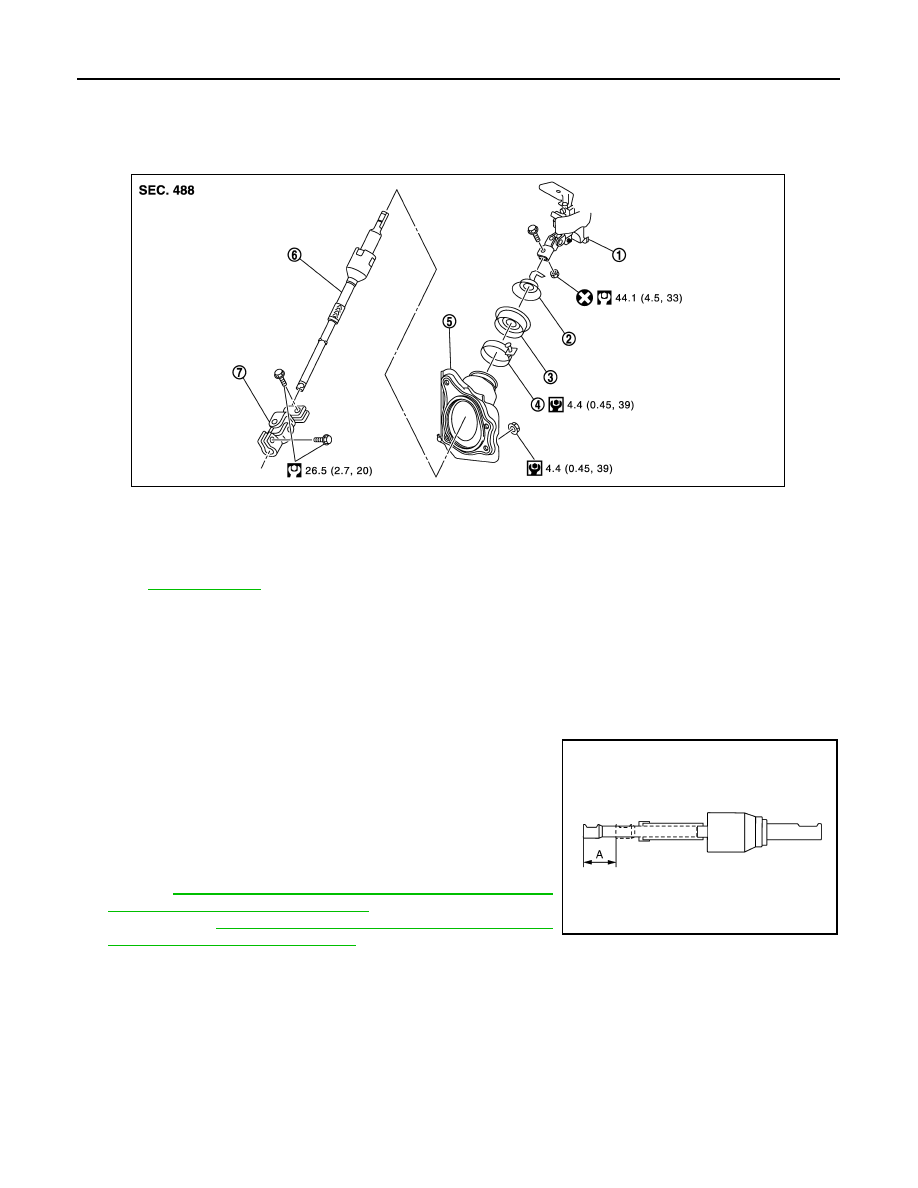
Exploded View
INFOID:0000000005235279
Removal and Installation
INFOID:0000000005235280
REMOVAL
1.
Set the vehicle to the straight-ahead position.
2.
Fix the steering wheel.
3.
Remove lower joint fixing bolt (steering gear side).
4.
Separate the lower shaft from the steering gear assembly by
sliding the slide shaft (A: sliding range).
CAUTION:
Spiral cable may be cut if steering wheel turns while sepa-
rating steering column assembly and steering gear assem-
bly. Be sure to secure steering wheel using string to avoid
turning.
5.
Remove the accelerator pedal bracket and lever assembly.
Refer to
ACC-3, "MODELS WITHOUT DISTANCE CONTROL
ASSIST SYSTEM : Exploded View"
(without distance control
assist system),
ACC-4, "MODELS WITH DISTANCE CONTROL
ASSIST SYSTEM : Exploded View"
(with distance control assist
system).
6.
Remove the parking brake wire clamp stay.
7.
Remove the hole cover mounting nuts.
8.
Remove the upper joint fixing bolt and nut (lower shaft side).
9.
Remove the lower shaft and hole cover.
10. Remove collar, hole cover seal, clamp and hole cover.
INSTALLATION
Note the following, and install in the reverse order of removal.
CAUTION:
1.
Steering column assembly
2.
Collar
3.
Hole cover seal
4.
Clamp
5.
Hole cover
6.
Lower shaft
7.
Lower joint
Refer to
for symbols in the figure.
JSGIA0357GB
JSGIA0035ZZ