Content .. 1065 1066 1067 1068 ..
Infiniti FX35, FX50 (S51). Manual - part 1067
EXT-18
< REMOVAL AND INSTALLATION >
REAR BUMPER
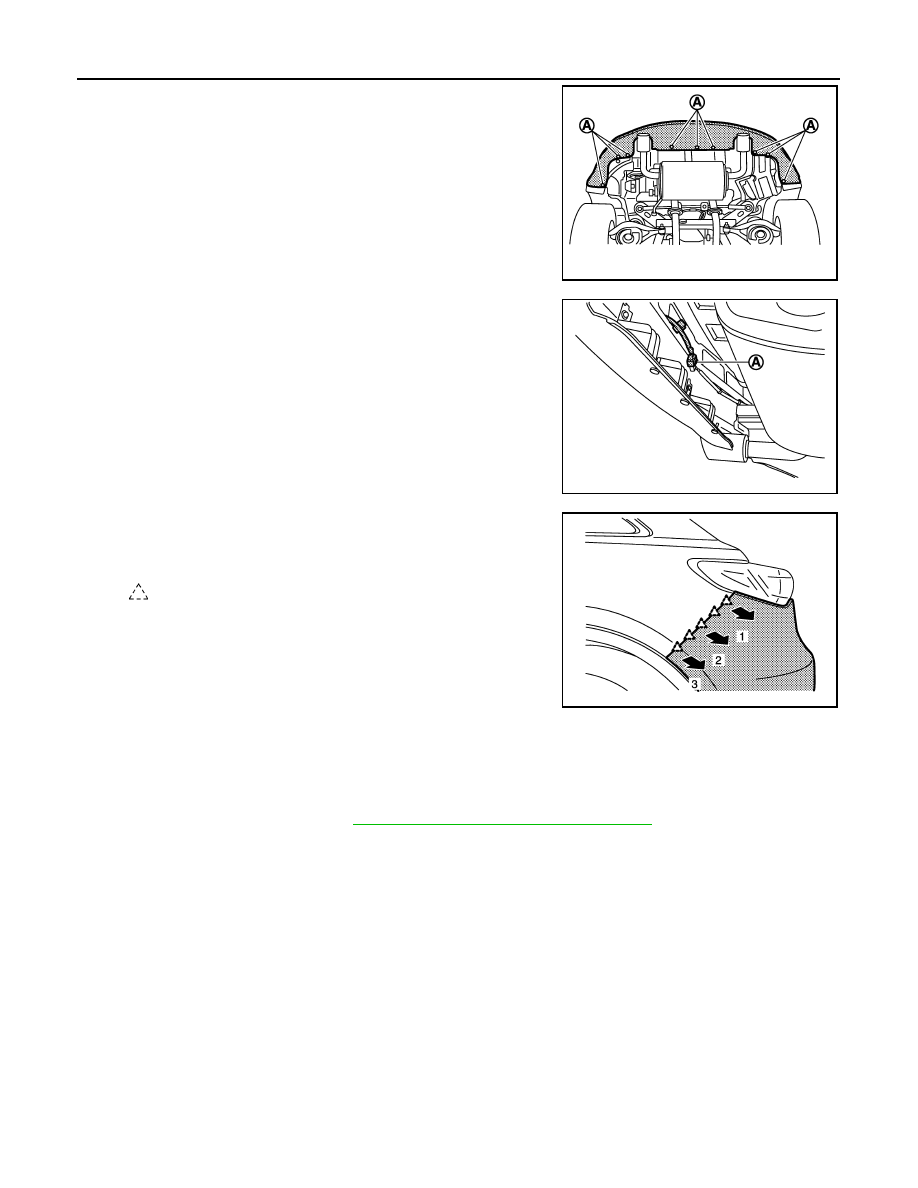
7.
Remove bumper fascia assembly underside fixing clips (A).
8.
Disconnect bumper sub harness connector (A).
9.
Pull both sides bumper fascia assembly toward the vehicle out
side to disengage the bumper fascia assembly from bumper
side brackets (LH/RH).
10. Remove bumper fascia assembly.
CAUTION:
When removing bumper fascia, 2 workers are required so as to prevent it from dropping.
11. Remove the following parts after removing bumper fascia.
• Reflex reflectors (LH/RH).
• Sonar sensors (LH/RH). Refer to
AV-360, "REAR : Removal and Installation"
• Bumper sub harness.
12. Remove bumper energy absorber.
13. Remove bumper reinforcement mounting nuts and bolts, and then remove bumper reinforcement with
power tool.
INSTALLATION
Install in the reverse order of removal.
NOTE:
JMKIA2711ZZ
JMKIA2712ZZ
: Pawl
JMKIA2713ZZ