Infiniti EX35. Manual - part 1447


  Index      Infiniti     Infiniti EX35 - service repair manual 2008 year


Search            


Content   ..  1445  1446  1447  1448   ..


Infiniti EX35. Manual - part 1447


TM-176

< ON-VEHICLE REPAIR >

[5AT: RE5R05A]

PARKING COMPONENTS

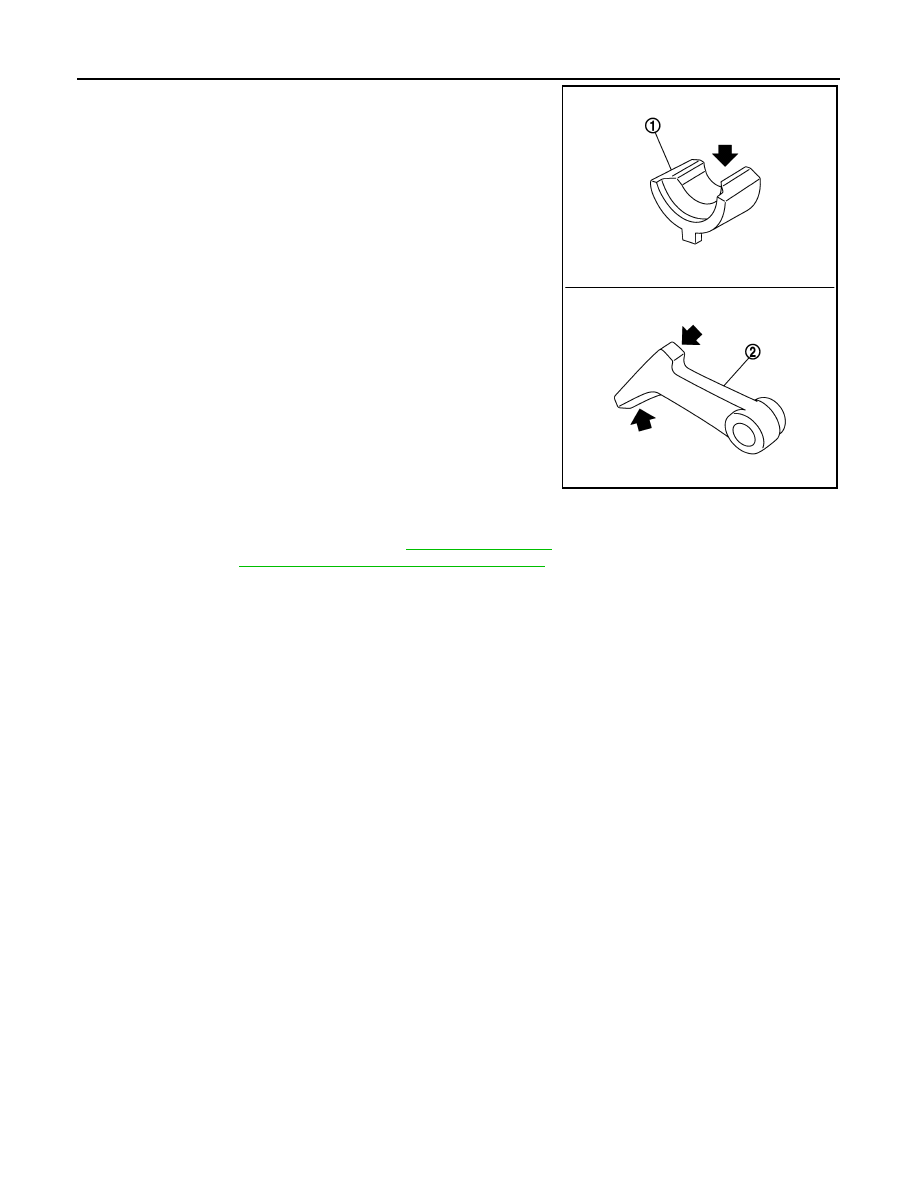
If the contact surface on parking actuator support (1), parking pawl
(2) and etc. has excessive wear, abrasion, bend, or any other dam-
age, replace the components.

INSPECTION AFTER INSTALLATION

Check the following item after completing installation.
• A/T fluid leakage and A/T fluid level. Refer to 

TM-141, "Inspection"

.

• A/T position. Refer to

TM-153, "2WD : Inspection and Adjustment"

.

JPDIA0034ZZ

REAR OIL SEAL

TM-177

< ON-VEHICLE REPAIR >

[5AT: RE5R05A]

C

E

F

G

H

I

J

K

L

M

A

B

TM

N

O

P

REAR OIL SEAL

2WD

2WD : Exploded View

INFOID:0000000003130620

2WD : Removal and Installation

INFOID:0000000003130621

REMOVAL

1.

Remove exhaust front tube and center muffler with power tool. Refer to 

EX-5, "Exploded View"

.

2.

Remove rear propeller shaft. Refer to 

DLN-81, "Exploded View"

.

3.

Remove rear oil seal (1) using a flat-bladed screwdriver (A).

CAUTION:

Be careful not to scratch rear extension assembly.

INSTALLATION

Note the following, and install in the reverse order of removal.
• As shown in the figure, use the drift [SST: ST33400001 (J-26082)]

(A) to drive rear oil seal into rear extension assembly until it is
flush.

CAUTION:

• Do not reuse rear oil seal.
• Apply ATF to rear oil seal.

1.

Rear oil seal

2.

A/T

Refer to 

GI-4, "Components"

 for symbols in the figure.

JSDIA0176ZZ

JPDIA0037ZZ

JPDIA0039ZZ

TM-178

< ON-VEHICLE REPAIR >

[5AT: RE5R05A]

REAR OIL SEAL

2WD : Inspection

INFOID:0000000003130622

INSPECTION AFTER INSTALLATION

Check A/T fluid leakage and A/T fluid level after completing installation. Refer to 

TM-141, "Inspection"

.

AWD

AWD : Exploded View

INFOID:0000000003130623

AWD : Removal and Installation

INFOID:0000000003130624

REMOVAL

1.

Remove exhaust front tube and center muffler with power tool. Refer to 

EX-5, "Exploded View"

.

2.

Remove rear propeller shaft. Refer to 

DLN-89, "Exploded View"

.

3.

Remove exhaust mounting bracket. Refer to 

EX-5, "Exploded View"

.

4.

Remove three way catalyst (right bank). Refer to 

EX-5, "Exploded View"

5.

Remove front propeller shaft. Refer to 

DLN-75, "Exploded View"

.

6.

Remove transfer assembly from A/T assembly. Refer to 

DLN-50, "Exploded View"

.

7.

Remove rear oil seal (1) using a flat-bladed screwdriver (A).

CAUTION:

Be careful not to scratch adapter case assembly.

INSTALLATION

Note the following, and install in the reverse order of removal.

1.

Rear oil seal

2.

A/T

Refer to 

GI-4, "Components"

 for symbols in the figure.

JSDIA0177ZZ

JPDIA0038ZZ

REAR OIL SEAL

TM-179

< ON-VEHICLE REPAIR >

[5AT: RE5R05A]

C

E

F

G

H

I

J

K

L

M

A

B

TM

N

O

P

• As shown in the figure, use the drift [64 mm (2.52 in) dia. commer-

cial service tool] (A) to drive rear oil seal into adapter case assem-
bly until it is flush.

CAUTION:

• Do not reuse rear oil seal.
• Apply ATF to rear oil seal.

AWD : Inspection

INFOID:0000000003130625

INSPECTION AFTER INSTALLATION

Check for A/T fluid leakage and A/T fluid level after completing installation. Refer to 

TM-141, "Inspection"

.

JPDIA0040ZZ


Content   ..  1445  1446  1447  1448   ..