Honda Ridgeline. Manual - part 383


  Index      Honda     Honda Ridgeline - service repair manual 2006-2008 year


Search            


Content   ..  381  382  383  384   ..


Honda Ridgeline. Manual - part 383


01

02

03

SJC8A00J18573535275KBAT00

20-170

Pickup Bed

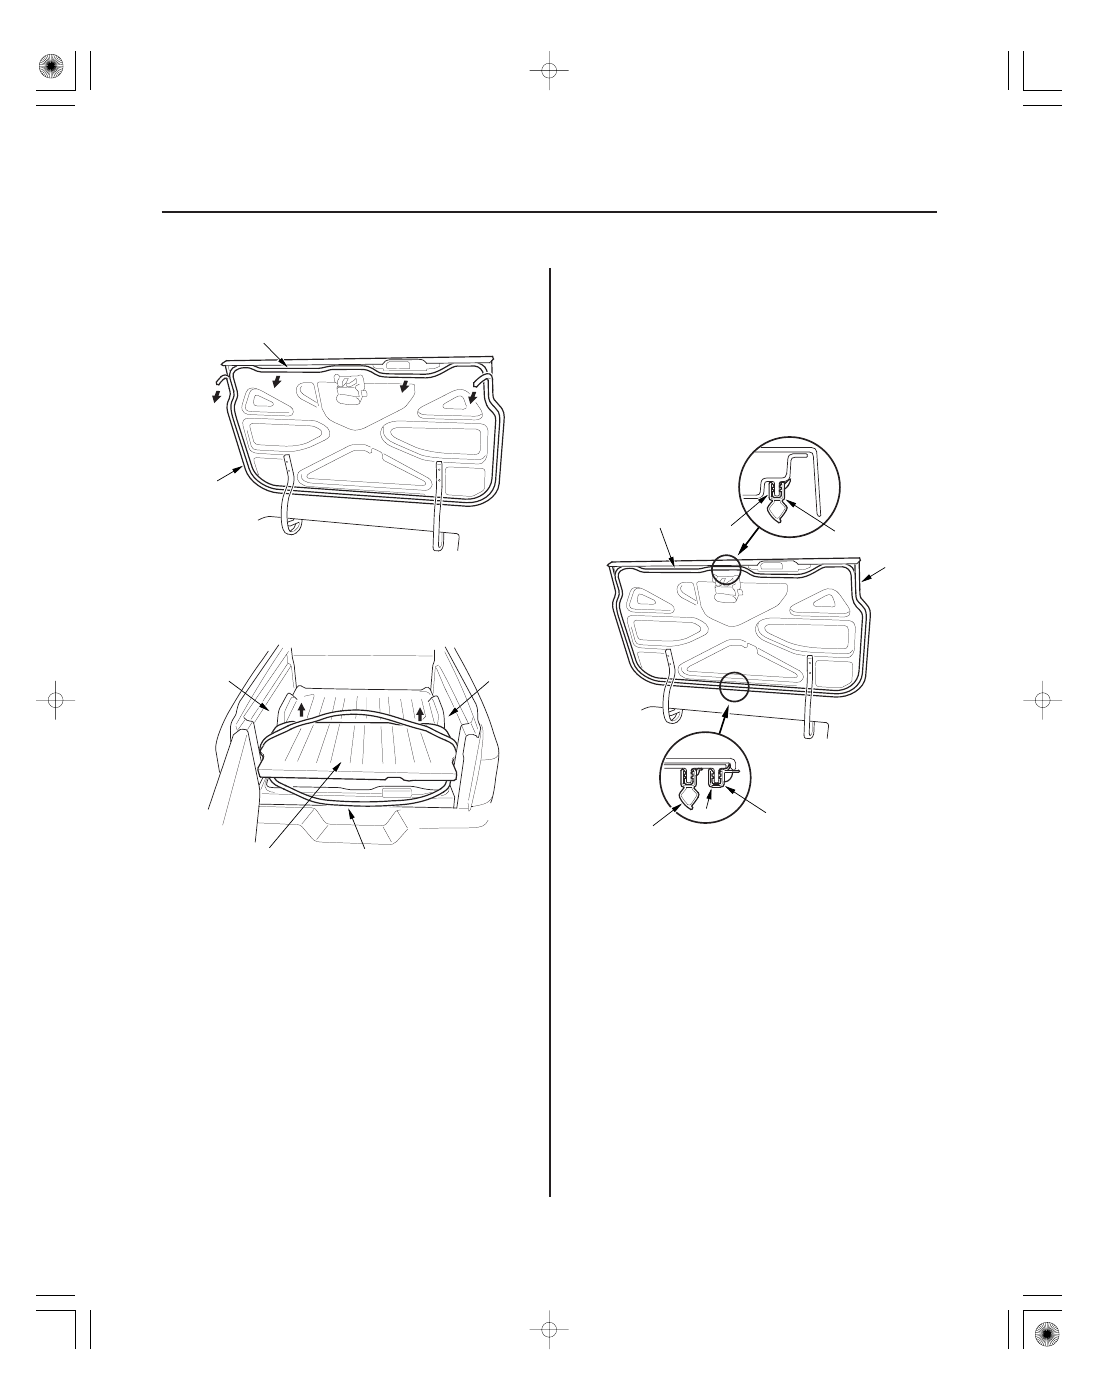
In-Bed Trunk Lid Weatherstrip Replacement

A

B

A

B

C

C

A

D

B

C

D

B

D

1. Remove the in-bed trunk lid weatherstrip (A) and

in-bed trunk lid edge weatherstrip (B) by pulling
them off.

2. While closing the in-bed trunk lid (A), Pull out the

in-bed trunk lid weatherstrip (B) from between the
lid and side bed panels (C), then remove the
weatherstrip.

3. Locate the painted alignment mark (A) on the in-

bed trunk lid edge weatherstrip (B) and locate the
bonded ends position (C) on the in-bed trunk lid
weatherstrip (D). Align the painted mark and the
bonded ends position in the center of the in-bed
trunk lid, and install the in-bed trunk lid
weatherstrips all the way around in the direction
shown. Make sure there are no wrinkles in the
weatherstrips.

4. Check for water leaks.

01

02

SJC8A00J18500014900KBAT00

20-171

Exterior Trim

Front Bulkhead Cover Replacement

Fastener Locations

: Clip, 3

A

Fastener Locations

: Clip, 9

A

B

C

D

C

B

NOTE: Take care not to scratch the front bumper and
body.

1. Remove the clips, then remove the air intake duct

(A).

2. Remove the front bulkhead cover (A).

–1 Remove the clips.
–2 Release the side edges (B) of the cover from

the front fenders (C) on both sides, and pass
the hood latch knob (D) through the hole in the
cover.

3. Install the cover in the reverse order of removal,

and note these items:

• Check if the clips are damaged or stress-

whitened, and if necessary, replace them with
new ones.

• Push the clips into place securely.

01

02

SJC8A00J18573430201KBAT00

Front Bumper Mesh Replacement

Front Grille Molding Replacement
(For some ’07-08 models)

20-172

Exterior Trim

Front Grille Replacement

Fastener Locations

: Screw, 9

A

B

C

D

E

A

B

D

D

A

B

B

B

Fastener Locations

: Screw, 8

A

B

C

B

C

NOTE: Take care not to scratch the front bumper.

1. Remove the front bumper (see page 20-132).

2. Remove the front bumper mesh (A).

–1 Remove the screws.
–2 Release the hooks (B) of the bumper mesh.
–3 Pull out the bumper mesh from the groove (C)

of the front bumper (D) to release the ribs (E) of
the bumper mesh.

3. Install the bumper mesh in the reverse order of

removal, and push the hooks into place securely.

NOTE: Take care not to scratch the front bumper.

1. Remove the front bumper mesh.

2. Remove the screws, and release the hooks (A), then

remove the front grille molding (B) from the front
bumper mesh (C).

3. Install the grille molding in the reverse order of

removal, and push the hooks into place securely.

01

02

SJC8A00J18500017471KBAT00

Special Tools Required

20-173

Cowl Cover Replacement

Fastener Locations

: Clip, 6

A

: Clip, 2

E

A

B

C

D

E

E

A

A

A

A

A

Fastener Locations

: Clip, 4

A

B

C

D

E

H

F

E

G

KTC trim tool set SOJATP2014

Available through the American Honda Tool and
Equipment Program; call 888-424-6857

NOTE:

• Take care not to scratch the cowl cover and body.
• Use the appropriate tool from the KTC trim tool set to

avoid damage when prying components.

1. Remove the windshield wiper arms (see page

22-237).

2. Using a trim tool, detach the clips (A), then remove

the hood rear seal (B) from the passenger’s cowl
cover (C). Disconnect the windshield washer tube
(D), and remove the clips (E).

3. Detach the clips by carefully pulling the passenger’s

cowl cover (A) upward, and release the hook (B) on
the passenger’s cowl cover from the driver’s cowl
cover (C). Pull the cover forward to release the hook
(D), and pull the hinge cover (E) out from the front
fender (F) and windshield molding (G).

4. Disconnect the washer tube (H), then remove the

passenger’s cowl cover.

(cont’d)


Content   ..  381  382  383  384   ..