Honda Ridgeline. Manual - part 51
01
SJC8A00A32200000000FEAT02
01
02
SJC8A00A32200043701KBAT01
Engine Oil Temperature: 176 °F (80 °C)
Engine Oil Pressure:
At Idle:
70 kPa (0.7 kgf/cm , 10 psi) min.
At 3,000 rpm: 490 kPa (5.0 kgf/cm , 71 psi) min.
Capacity
At Oil Change:
4.0 L (4.2 US qt)
At Oil Change including Filter:
4.3 L (4.5 US qt)
After Engine Overhaul:
5.0 L (5.3 US qt)
2
2
8-6
8-6
Engine Lubrication
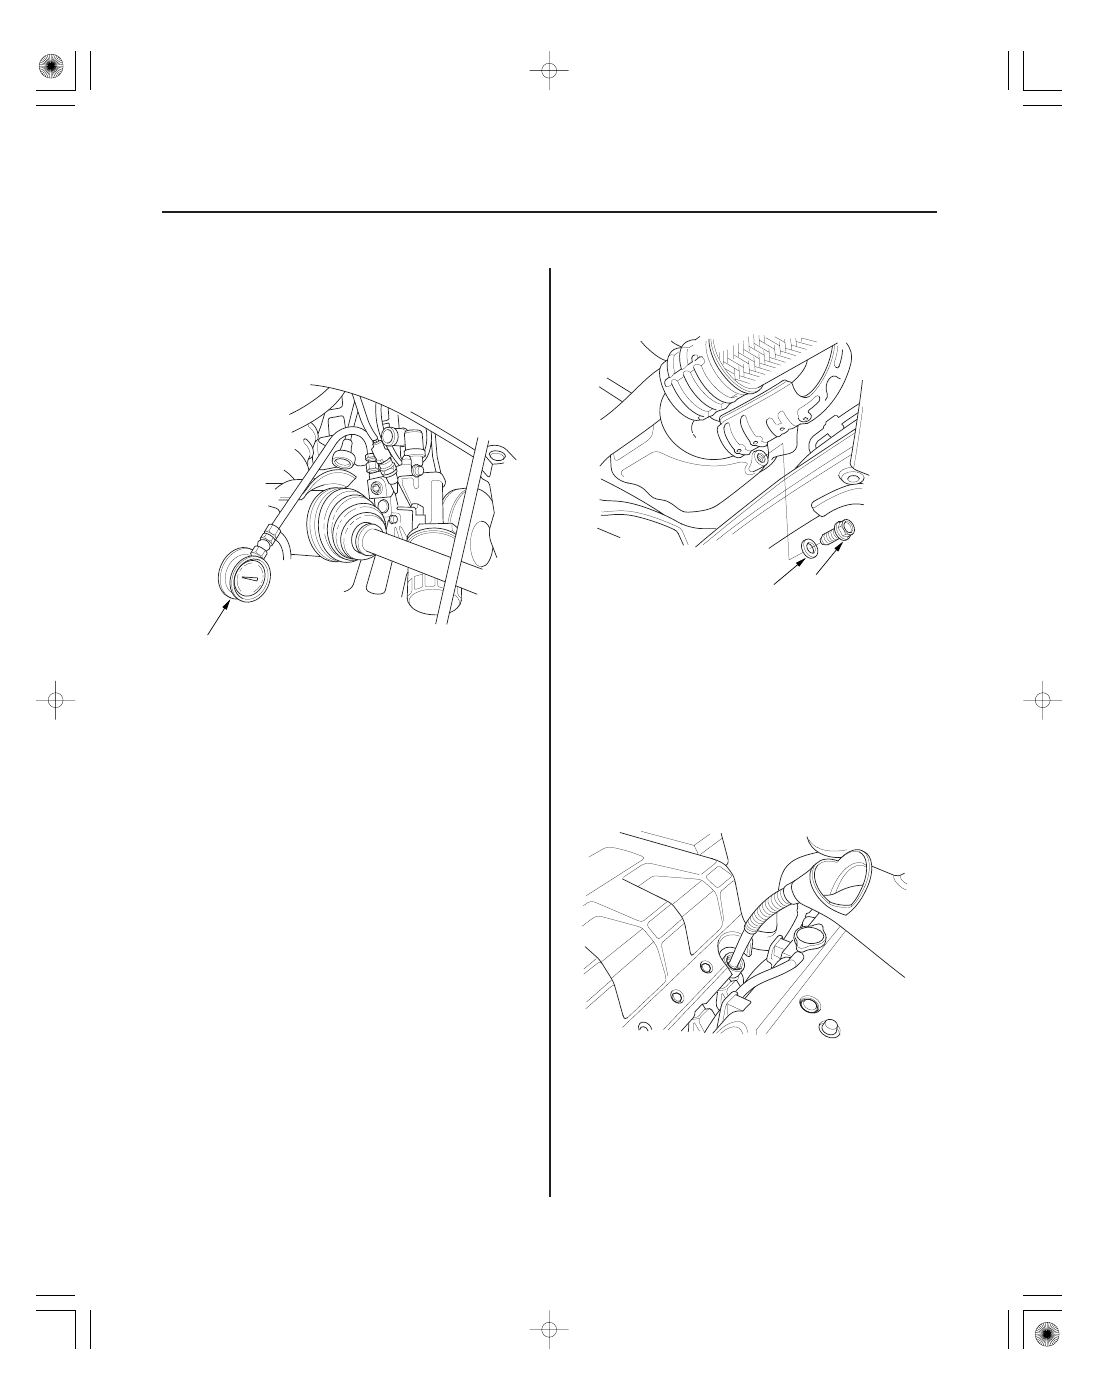
Oil Pressure Test
Engine Oil Replacement
A
A
39 N·m
(4.0 kgf·m, 29 lbf·ft)
B
If the low oil pressure indicator stays on with the engine
running, check the engine oil level. If the oil level is
correct:
1. Remove the engine oil pressure switch, then install
an oil pressure gauge (A).
2. Start the engine. Shut it off immediately if the
gauge registers no oil pressure. Repair the problem
before continuing.
3. Allow the engine to reach operating temperature
(fan comes on at least twice). The pressure should
be:
4. If oil pressure is out of specifications, inspect these
items:
• Inspect the oil pressure relief valve (see page 8-9).
• Check the oil screen for clogging.
• Inspect the oil pump (see page 8-11).
1. Warm up the engine.
2. Remove the drain bolt (A), and drain the engine oil.
3. Reinstall the drain bolt with a new washer (B).
4. Refill with the recommended oil (see page 3-2).
5. Run the engine for more than 3 minutes, then check
for oil leakage.
Do not overtighten.