Honda Odyssey 2004. Manual - part 150
−
*02
02
03
S0X4AZCA20323428531FEAT00
Special Tools Required
’01-04 models
Float Test
11-298
EVAP System
Fuel Tank Vapor Control Valve Test
A
9.8 N·m
(1.0 kgf·m,
7.2 lbf·ft)
A
9.8 N·m
(1.0 kgf·m,
7.2 lbf·ft)
A
B
A973X-041-
XXXXX
Vacuum Pump/Gauge, 0
30 in.Hg A973X-041-XXXXX
1. Make sure the fuel tank is less than half full.
2. Remove the fuel fill cap to relieve the fuel tank
pressure, then reinstall the cap.
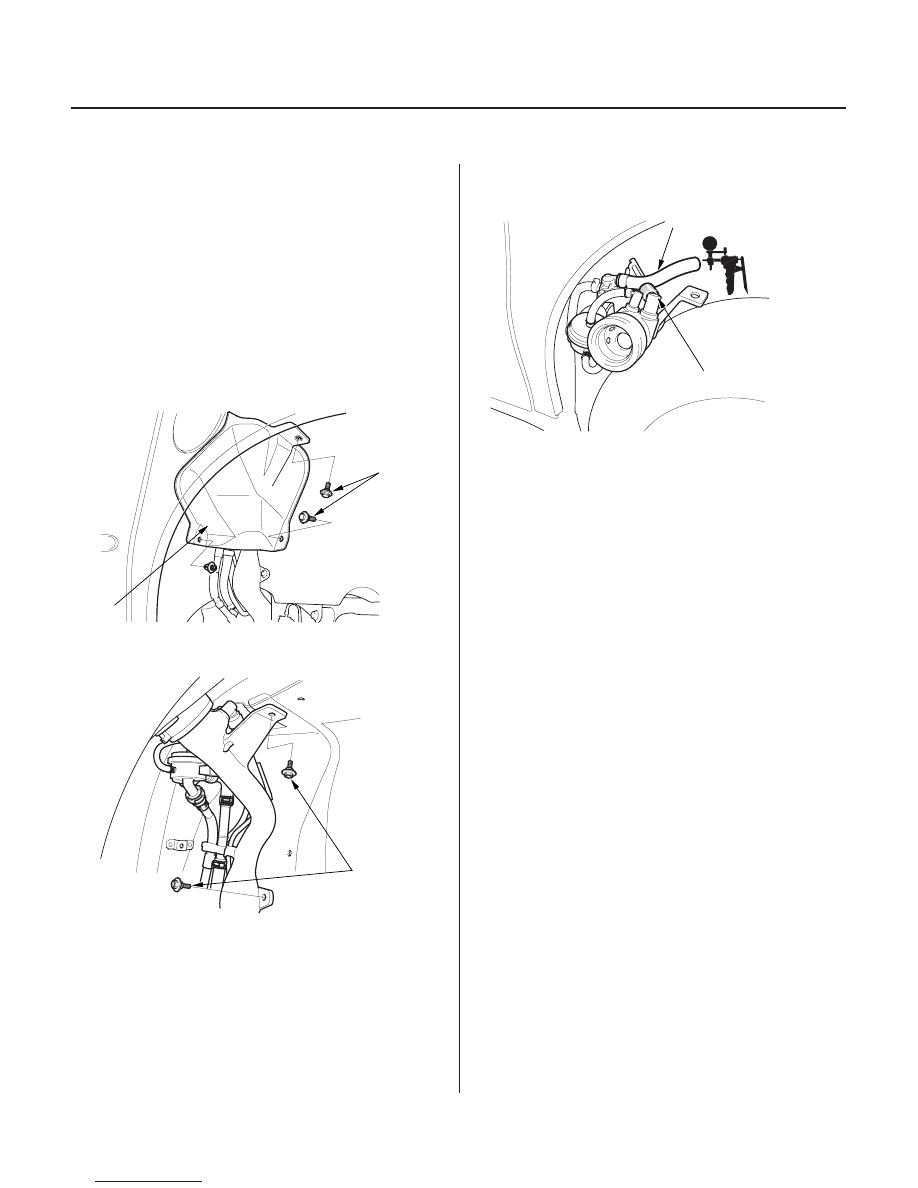
3. Remove the bolts and fuel tank vapor control valve
cover (A).
4. Remove the bolts (A).
5. Disconnect the fuel tank vapor recirculation tube
(A), and connect a vacuum pump to the tube.
6. Plug the fuel tank vapor recirculation port (B).
7. Apply vacuum to the fuel tank vapor recirculation
tube.
•
•
03/07/29 09:26:30 61S0X050_110_0298
If the vacuum holds, replace the fuel tank vapor
control valve (see page 11-301).
If the vacuum does not hold, the float is OK.
Go to step 1 of the valve test (see page 11-299).