Honda Odyssey 2004. Manual - part 36


  Index      Honda     Honda Odyssey 2004 - service repair manual 2004 year


Search            


Content   ..  34  35  36  37   ..


Honda Odyssey 2004. Manual - part 36


11

13

14

15

5-6

Engine Assembly

Engine Removal (cont’d)

B

A

E

C

D

B

A

A

B

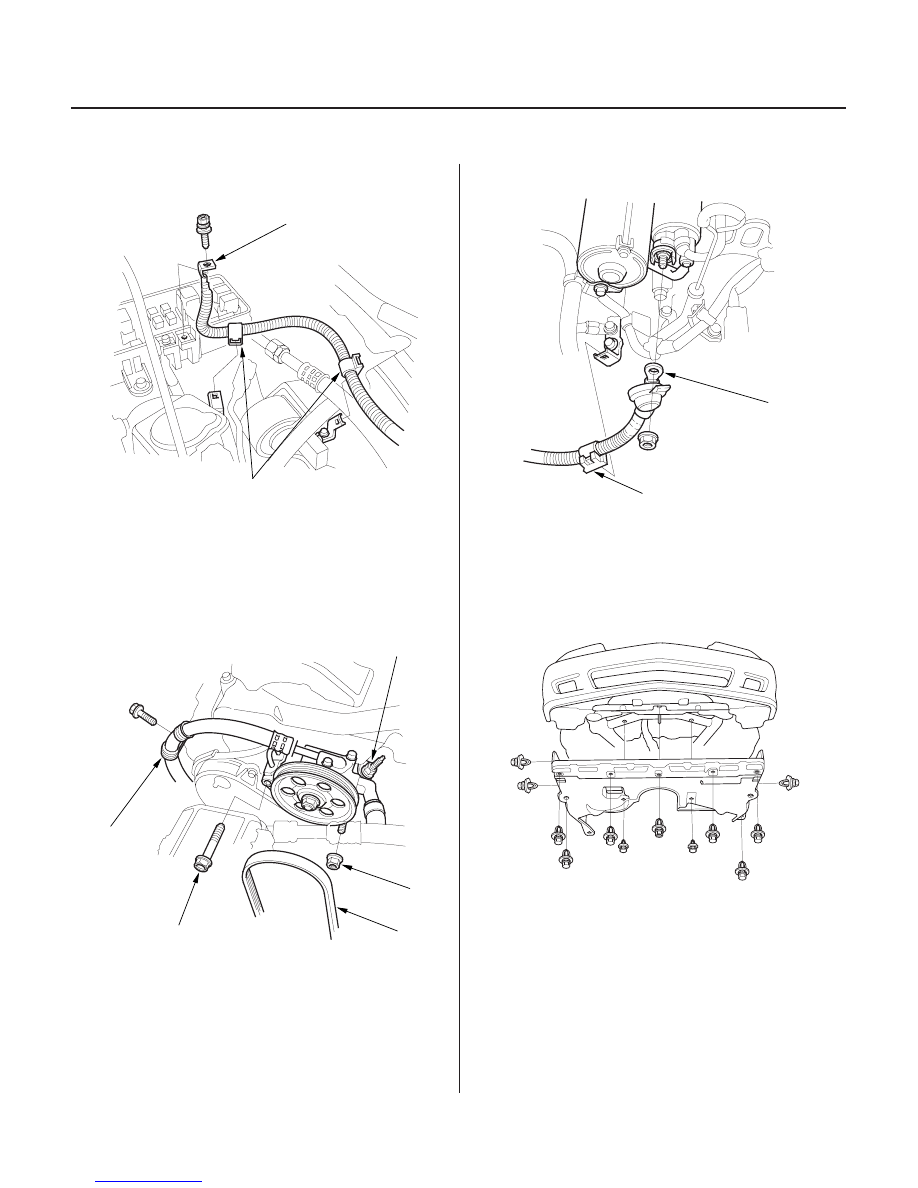
20. Remove the battery cable (A) from the under-hood

fuse/relay box, and remove the harness clamps (B).

21. Remove the alternator-compressor belt (see page

4-26).

22. Loosen the adjusting nut (A), and remove the

locknut (B) and mounting bolt (C), then remove the
power steering (P/S) pump belt (D) and pump
without disconnecting the P/S hoses.

23. Remove the P/S hose clamp (E).

24. Remove the starter cable (A) and harness clamp (B).

25. Remove the radiator cap.

26. Raise the vehicle on the hoist to full height.

27. Remove the front tires/wheels.

28. Remove the splash shield.

03/07/29 09:09:12 61S0X050_050_0006

16

*03

18

5-7

A

B

A

B

C

D

E

F

A

B

29. Drain the engine coolant (see page 10-13).

30. Drain the automatic transmission fluid (ATF).

Reinstall the drain plug using a new washer for
1999-2001 models (see page 14-137) or 2002-2004
models (see page 14-368).

31. Drain the engine oil. Reinstall the drain bolt using a

new washer (see page 8-5).

32. Disconnect the primary heated oxygen sensor

(primary HO2S) connector (A), then remove
exhaust pipe A (B).

33. Disconnect the stabilizer links (see page 18-19).

34. Disconnect the suspension lower arm ball joints

(see step 15 on page 18-13).

35. Remove the driveshafts (see page 16-3). Coat all

precision-finished surfaces with clean engine oil.
Tie plastic bags over the driveshaft ends.

36. Remove the bolts (A) securing the shift cable holder

(B), then remove the shift cable cover (C).
To prevent damage to the control lever joint, be
sure to remove the bolts securing the shift cable
holder before removing the bolts securing the shift
cable cover.

37. Remove the lock bolt (D) securing the control lever

(E), then remove the shift cable (F) with the control
lever. Take care not to bend the shift cable while
removing it.

38. Unplug the P/S hose clamps (A), and remove the

P/S hose clamp mounting bolt (B).

(cont’d)

03/07/29 09:09:13 61S0X050_050_0007

19

20

21

22

5-8

Engine Assembly

Engine Removal (cont’d)

B

A

39. Remove the nuts securing the transmission lower

front mount and transmission lower rear mount.

40. Remove the stiffeners.

41. Remove the P/S hose clamp mounting bolts (A) and

harness clamp (B).

42. Remove the steering gearbox mount from the front

subframe.

03/07/29 09:09:14 61S0X050_050_0008

23

24

04

*04

5-9

A

B

C

43. Remove the bolts securing the rear mount.

44. Lower the hoist, then remove the upper radiator

hose (A) and lower radiator hose (B).

45. Remove the water bypass hoses (C) (’99-01

models).

46. Remove the heater hoses.

47. Remove the ATF cooler hoses, then plug the ATF

cooler hoses and lines.

(cont’d)

03/07/29 09:09:15 61S0X050_050_0009


Content   ..  34  35  36  37   ..