Honda Odyssey 2004. Manual - part 22
01
*01
S0X4A00A46500056901KBAT00
4-8
Starting System
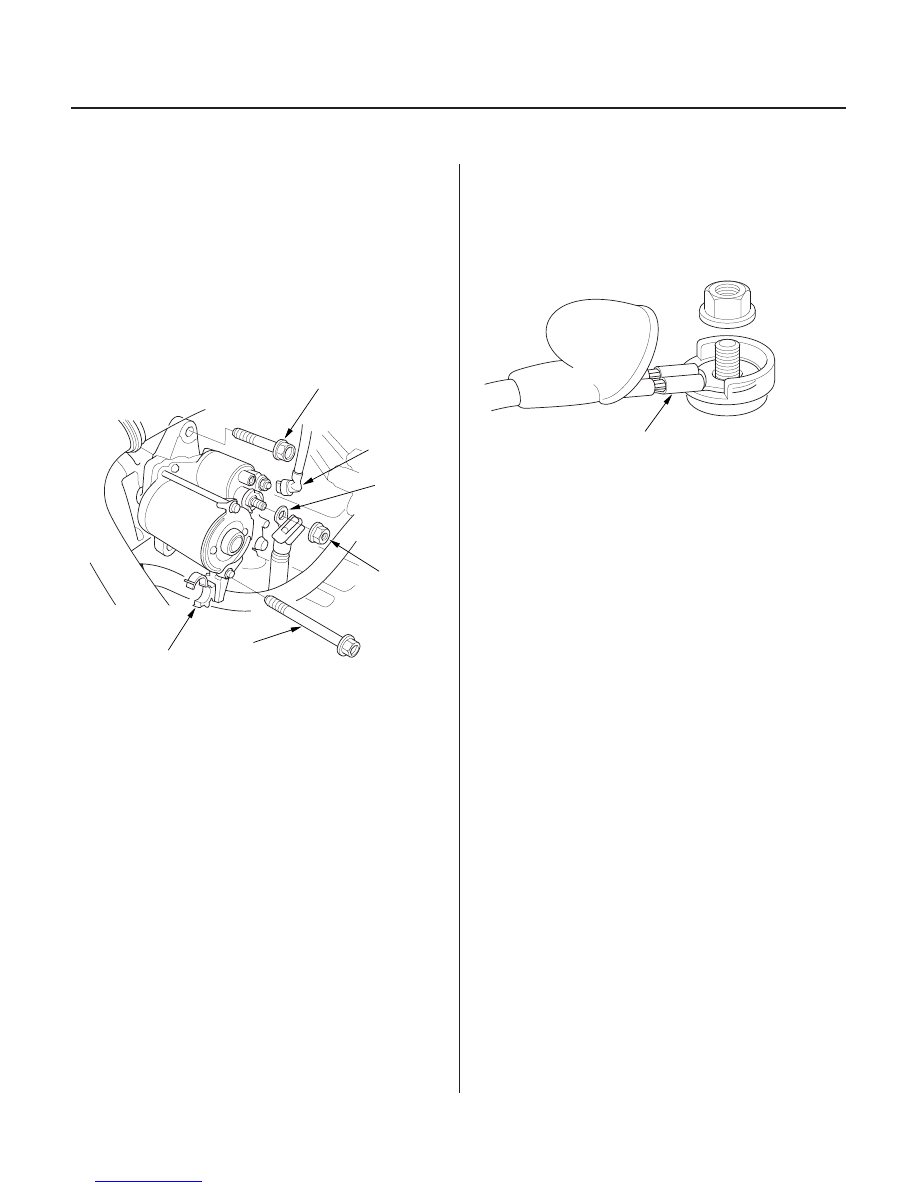
Starter Replacement
D
10 x 1.25 mm
44 N·m (4.5 kgf·m,
33 lbf·ft)
8 x 1.25 mm
9 N·m
(0.9 kgf·m,
7 lbf·ft)
D
12 x 1.25 mm
64 N·m (6.5 kgf·m, 47 lbf·ft)
C
B
A
A
1. Make sure you have the anti-theft code for the radio
and the navigation system, then write down the
frequencies for the radio’s preset buttons.
2. Disconnect the negative cable from the battery first,
then disconnect the positive cable.
3. Unlatch the automatic transmission fluid (ATF)
cooler hose clamp (A), then disconnect the starter
cable (B) from the B terminal on the solenoid, then
disconnect the BLK/WHT wire (C) from the
S terminal.
4. Remove the two bolts (D) holding the starter, then
remove the starter.
5. Install in the reverse order of removal. Make sure
the crimped side of the ring terminal (A) is facing
out.
6. Connect the battery positive cable and negative
cable to the battery.
7. Start the engine to make sure the starter works
properly.
8. Enter the anti-theft code for the radio and the
navigation system, then enter the customer’s radio
station presets.
9. Perform the powertrain control module (PCM) idle
learn procedure (see page 11-202), and power
window control unit reset procedure (2003-2004
models) (see page 22-200).
10. Set the clock.
03/07/29 09:07:18 61S0X050_040_0008