Honda Element. Manual - part 328
Courtesy of AMERICAN HONDA MOTOR CO., INC.
2. M/T model: Remove the clutch reservoir bracket from the vehicle, and move it aside. Do not disconnect
the clutch hose from the reservoir.
3. Remove the reservoir cap and brake fluid from the master cylinder reservoir with a syringe.
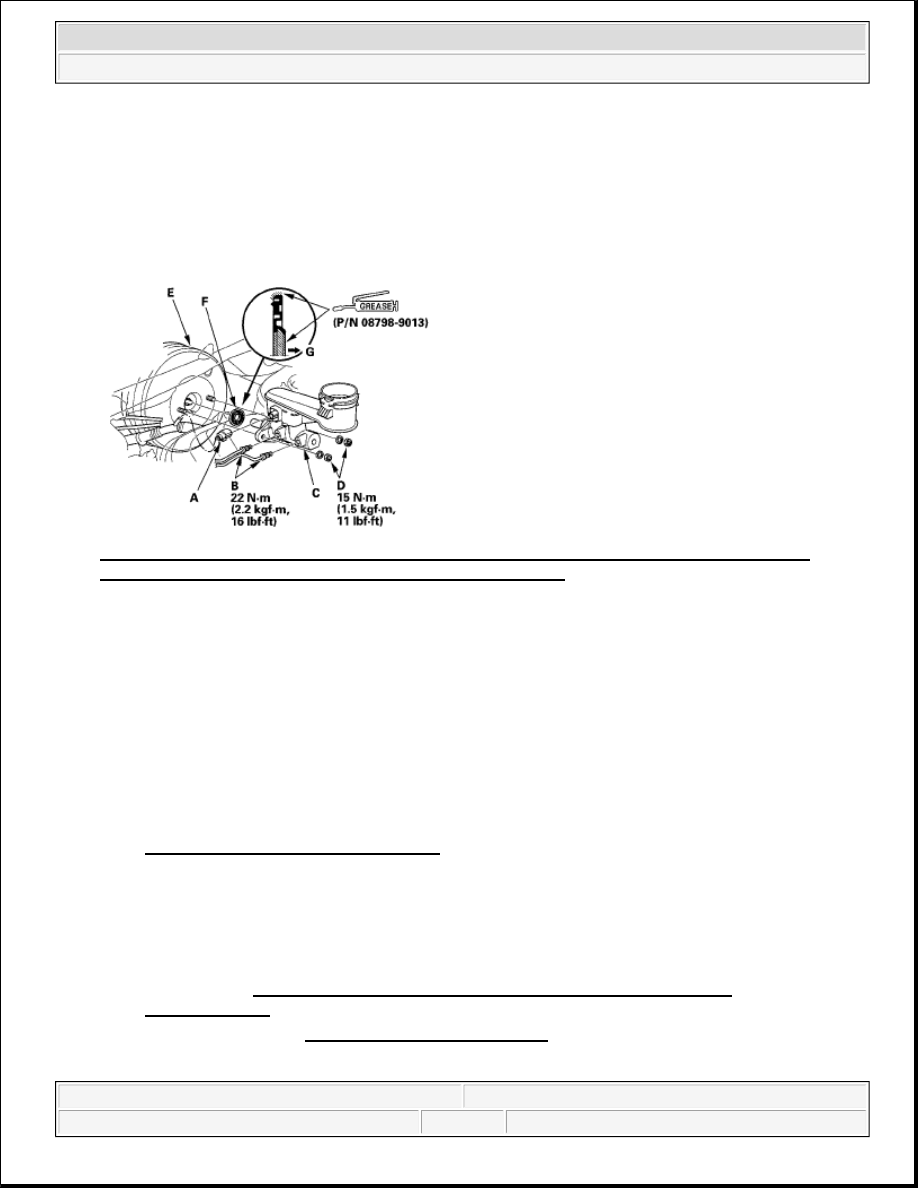
4. Remove the brake fluid level switch connector (A).
Fig. 35: Identifying Brake Fluid Level Switch Connector, Brake Lines, Master Cylinder And
Master Cylinder Mounting Nuts With Torque Specifications
Courtesy of AMERICAN HONDA MOTOR CO., INC.
5. Disconnect the brake lines (B) from the master cylinder (C). To prevent spills, cover the hose joints with
rags or shop towels.
6. Remove the master cylinder mounting nuts (D) and washers.
7. Remove the master cylinder from the brake booster (E). Be careful not to bend or damage the brake lines
when removing the master cylinder.
8. Remove the rod seal (F) from the master cylinder.
9. Install the master cylinder in the reverse order of removal, and note these items:
Replace all the rubber parts with new ones whenever the master cylinder is removed.
Check the pushrod clearance before installing the master cylinder, and adjust it if necessary (see
MASTER CYLINDER INSPECTION ).
Use a new rod seal on reassembly.
Coat the inner bore lip and outer circumference of the new rod seal with the Shin-Etsu silicone
grease (P/N 08798-9013).
Install the rod seal onto the master cylinder with its grooved side (G) toward the master cylinder.
Check the brake pedal height and free play after installing the master cylinder, and adjust it if
necessary (see BRAKE PEDAL AND BRAKE PEDAL POSITION SWITCH
ADJUSTMENT ).
10. Bleed the brake system (see BRAKE SYSTEM BLEEDING ).
11. Spin the wheels to check for brake drag.
2007 Honda Element EX
2007-2008 BRAKES Conventional Brake Components - Element