Porshe 911 (997). Manual - part 291


  Index      Hummer     Porshe 911 997 series - service repair manual 2004-2008 year


Search            


Content   ..  289  290  291  292   ..


Porshe 911 (997). Manual - part 291


Increased risk of damage to brake discs when mounting/removing wheels.

The brake discs can be damaged.

• 

→ Use assembly aid (assembly pins) in order to exclude any possibility of heavy contact of the wheel

with the brake disc.

Removing rear brake disc

WARNING

Risk of accidents if brake pads and/or brake discs are not replaced in time.

Danger of injury and damage to vehicle if braking effect is impaired.

• 

→ The brake pads must be replaced when the brake pad warning indicator lights up, but no later than

when there is a residual pad thickness of 2 mm.

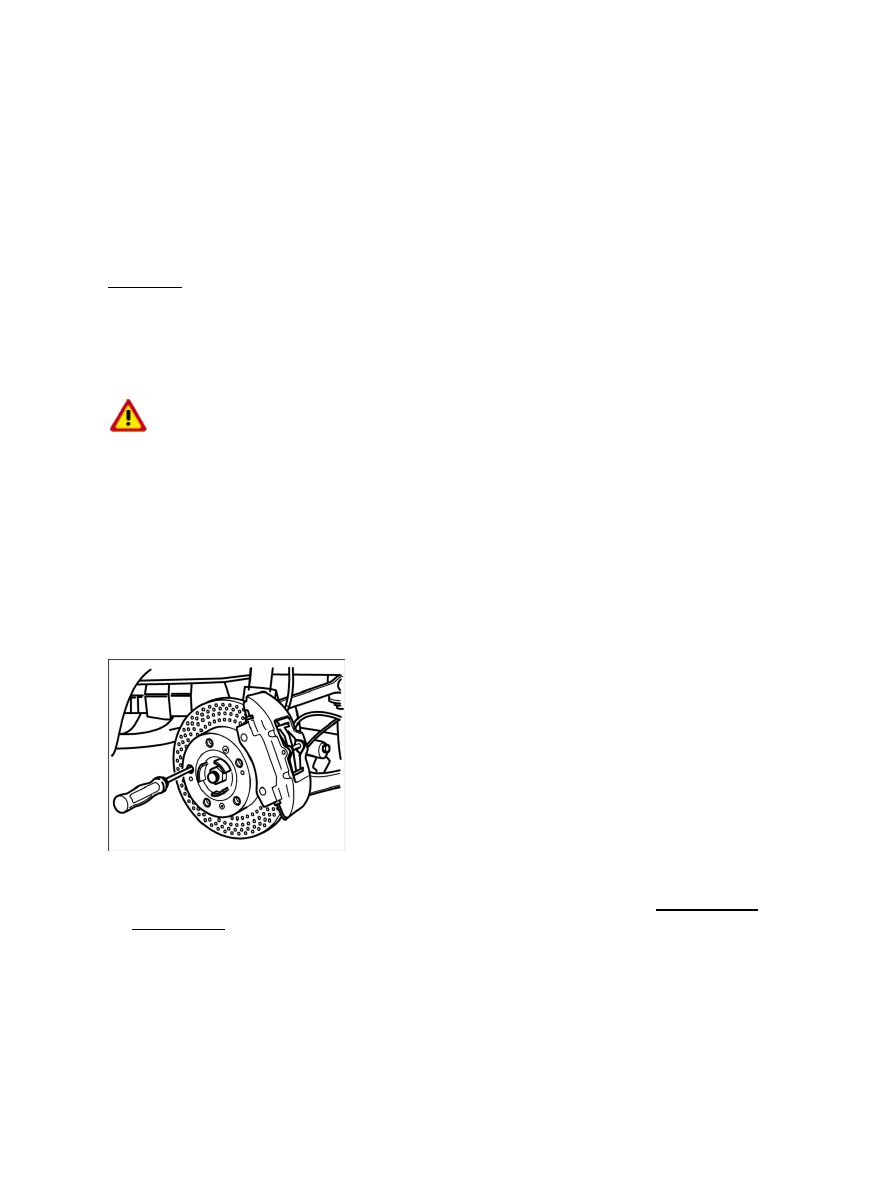
1. The adjustment fixture can be twisted through the bores in the wheel

mounting.

Adjusting the parking brake

2. Turn the brake disc in such a way that the adjustment fixture becomes visible. Using a

-screwdriver-

 , turn the adjustment fixture towards "release" through the bore. → Adjusting the

parking brake

Diagnostic system: reading out fault memory and activating systems

General warning notes

1321

Pushing back brake pad

3. Push brake pads back slightly and evenly using piston resetting fixture (replaces P83) NR.144, see

Workshop Equipment Manual, Chapter 2.4 -arrow- .

4. Undo brake calliper on wheel carrier and hang it in a suitable place in the wheel well (do not open the

brake hydraulics). To do this, separate the holder for the brake hose/wear indicator at the body side.

5. Remove brake disc after unscrewing the fastening screws. If necessary, remove the brake disc by

tapping it gently with a rubber hammer.

Installing rear brake disc

WARNING

Risk of accidents if brake pads and/or brake discs are not replaced in time.

Danger of injury and damage to vehicle if braking effect is impaired.

• 

→ The brake pads must be replaced when the brake pad warning indicator lights up, but no later than

when there is a residual pad thickness of 2 mm.

ATTENTION

Increased risk of damage to brake discs when mounting/removing wheels.

The brake discs can be damaged.

• 

→ Use assembly aid (assembly pins) in order to exclude any possibility of heavy contact of the wheel

with the brake disc.

The brake discs have different part numbers (Part No.)!

Diagnostic system: reading out fault memory and activating systems

Removing rear brake disc

1322

1. Check that all parts are in perfect condition and replace them if necessary.

2. Clean the levelling and centring surfaces on the brake disc and wheel hub. Then apply a very thin

coat of Optimoly TA to the centring surface on the wheel hub.

3. Fit the brake disc. Observe specified tightening torque. → 421000  Tightening torques for rear axle

Adjusting the parking brake

4. Adjust the brake shoes of the foot-operated parking brake with a screwdriver. → 468316 Adjusting

brake shoes → Adjusting the parking brake

5. Fit the brake calliper. Replace the brake calliper fastening screws each time they are removed.

Observe specified tightening torque. → 421000  Tightening torques for rear axle

6. Position disc brake pads by operating the brake several times.

Brake system: checking fluid level

7. Check the brake fluid level and correct if necessary. The brake fluid level must be between the

MAX-MIN marking. → Brake system: checking fluid level → 470801 Checking brake fluid level

Subsequent work

→ 440519 Removing and installing wheel

997110, 997111

Diagnostic system: reading out fault memory and activating systems

Installing rear brake disc

1323

C23, C24, C25, C26, C27, C28, C32, C33, C34, C35, C36, C37, C38, C39, C45, C46, C98, C99

WARNUNG

Gefahr des Verlusts der Text-Bild-Zuordnung beim Ausdruck.

Aus technischen Gründen kann derzeit nicht ausgeschlossen werden, dass trotz
einwandfreier Darstellung auf dem Bildschirm beim Ausdruck der
Zusammenhang von Text und zugehörigem Bild verloren geht.

• 

Wird der Fehler nicht bemerkt, besteht die Gefahr, daß Arbeiten nicht korrekt
durchgeführt werden und es dadurch zu Personen- und Sachschäden kommt.

• 

→ Vergleichen Sie deshalb nach dem Druckvorgang unbedingt die Ausdrucke mit der
Bildschirmdarstellung. Korrigieren Sie die Ausdrucke im Fehlerfall so, daß der Inhalt der
Bildschirmdarstellung zutreffend wiedergegeben wird.

WARNING

Danger of losing text-figure correspondence when printing out.

For technical reasons, it can currently not be ruled out that the correspondence
between text and associated figure can be lost when it is printed out, even though
the display on the screen is correct.

• 

If the fault is not noticed, there is the danger that work will not be performed
correctly which can cause injury and damage.

• 

→ Therefore, always compare printouts with the screen display after printing them out. Correct
the printouts if they are faulty so that the content of the screen display matches that on the
printouts.

AVERTISSEMENT

Risque de perte de la correspondance texte-illustration lors de l'impression papier.

Pour des raisons techniques, il ne peut pas être exclu à l'heure actuelle que, même
en cas d'affichage correct à l'écran, la correspondance entre le texte et l'illustration
puisse être erronée sur l'impression papier.

• 

Si l'erreur passe inaperçue, on court le risque d'exécuter certaines opérations de
manière incorrecte pouvant conduire à des dommages corporels et matériels.

• 

→ Comparez impérativement pour cette raison les impressions papier avec l'affichage à l'écran.
Corrigez-les en cas d'erreur de manière à reproduire correctement l'affichage à l'écran.

ATTENZIONE

Pericolo di perdita dell'abbinamento testo-immagine nella stampa.

Per motivi tecnici non è escluso che, nonostante la rappresentazione sullo schermo
risulti perfetta, durante la stampa venga persa la corrispondenza fra testo e
relativa immagine.

• 

Diagnostic system: reading out fault memory and activating systems

Subsequent work

1324


Content   ..  289  290  291  292   ..