Porshe 911 (997). Manual - part 1029


  Index      Hummer     Porshe 911 997 series - service repair manual 2004-2008 year


Search            


Content   ..  1027  1028  1029  1030   ..


Porshe 911 (997). Manual - part 1029


24. Push on connectors for telephone control unit -50 to 53- until they are felt to engage. → 919019

Removing and installing control unit for telephone - chapter on "Installing"

24.1. Clip in wire harness for telephone control unit.

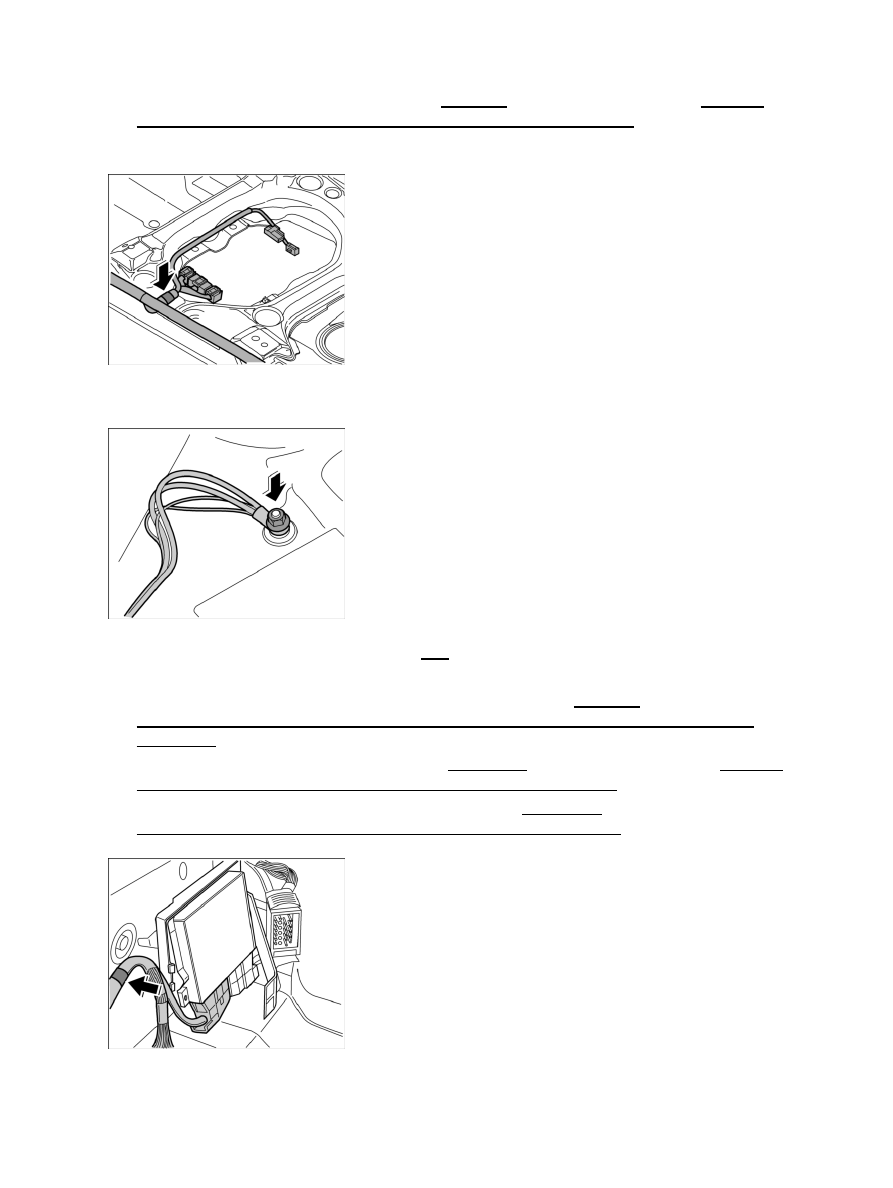
Clipping in wire harness under driver's seat

25. Clip in wire harness under driver's seat.

Securing ground point

26. Fasten ground point under the driver's seat -49- .

26.1. Connect ground straps and tighten with the fastening nut. → Tightening torque: 9 (6.5 ftlb.) Nm

27. Push on connectors for rear end convenience systems control unit -46 to 48- until they are felt to engage.

→ 578919 Removing and installing control unit for rear end convenience systems - chapter on
"Installing".

28. Push on connectors for ParkAssist control unit -44 and 45- until they are felt to engage. → 917419

Removing and installing ParkAssist control unit - chapter on "Installing"

29. Push on connectors for airbag sensor, centre left and right -42 und 43- until they are felt to engage.

→ 695119 Removing and installing airbag sensor - chapter on "Installing"

Clipping in wire harness for Tiptronic control module

30.

Diagnostic system: reading out fault memory and activating systems

Installing main wire harness in passenger compartment

4273

Push on connector for Tiptronic control module -41- until it is felt to engage, and lock it. → 373019
Removing and installing transmission control module - chapter on "Installing"

30.1. Clip in wire harness for Tiptronic control module.

31. Fit rubber sleeves -39 and 40- and push on connector for seat-belt tensioner, front left and right -37 and

38-

 . → 691319 Removing and installing front three-point seat belt with tensioner - chapter on

"Installing" [997310 997311 997320 997321 997610 997611 997620 997621]→ 691319 Removing and
installing front three-point seat belt with tensioner - chapter on "Installing" [997110 997111 997120
997121 997410 997411 997430 997431]

Connecting plug connection for main wire harness to rear wire harness

32. Connect plug connection between main wire harness and rear-end wire harness, left and right -33 and 34-

and lock.

Completing the vehicle

Engaging the support

1. Install left and right support.

1.1. Position the support and engage in lower side member.

Diagnostic system: reading out fault memory and activating systems

Completing the vehicle

4274

Securing the support

1.2. Press in the locating peg -1- of the support and check it is seated correctly.

1.3. Tighten the fastening nut -3- and fastening screws -2- . → Tightening torque: 7.2 (5.5 ftlb.) Nm

2. Lay the floor covering over the support and

engage.

Note

Ensure that belt strap can run properly!

Installing seat belt and fitting

3. Fasten seat belt mount at left and right.

3.1. Tighten fastening screw -2- , seat belt with fitting -3- and spacer sleeve -4- on inner lower side

member. → Tightening torque: 50 (37 ftlb.) Nm

3.2. Press in -1- cap.

Installing front main wire harness

Installation Location:

Diagnostic system: reading out fault memory and activating systems

Installing front main wire harness

4275

Overview of connectors for front main wire harness, shown on the 911

1

- Plug connection between main wire harness and front-end wire harness right

2

- Fuse box for fan

3

- Connector for front-end control unit

4-6

- Connector for navigation unit

7-8

- Connector for CD changer

9

- Connector for loudspeaker amplifier

10

- Connector for luggage compartment light

11

- Ground point

12

- Plug connection between main wire harness and front-end wire harness left

13

- Connector for hydraulic unit

14

- Connector for brake fluid sender

15

- Connector for tyre pressure monitoring system control unit

16

- Grommet

17-18

- Plug connection for ABS wire harness, front left and right

19-20

- Connector for tyre pressure monitoring system antenna, left and right

21

- Connector for filler flap switching element

22

- Connector for tank filler neck

23

- Connector for rod antenna

24

- Connector for GPS antenna

25

- Connector for radio antenna

26

- Connector for vertical sensor

27

- Connector for pressure switch

28

- Connector for alarm siren

29

- B+ line to power distributor

30-31

- Plug connection for PASM, front left and right

32-33

- Connector for windscreen washer system spray nozzle, left and right

34

- Connector for headlight beam adjustment angle sensor

Diagnostic system: reading out fault memory and activating systems

Installing front main wire harness

4276


Content   ..  1027  1028  1029  1030   ..