Porshe 911 (997). Manual - part 69


  Index      Hummer     Porshe 911 997 series - service repair manual 2004-2008 year


Search            


Content   ..  67  68  69  70   ..


Porshe 911 (997). Manual - part 69


Note

Always observe specified engine number range.

2. Grease fitted bore in crankcase and new bearing cover (with new sealing ring) with special grease

Optimoly MP3 (available from Porsche Parts Service) and place bearing cover in position.

Note

Replace collar nut M8 x 1 and coated M6 screws for bearing cover.

• 

3. Position three new, coated M6 x 20 screws on the crankcase and pull in the bearing cover by

screwing in the screws uniformly. Tighten the screws. → Tightening torque: 10 (7.5 ftlb.) Nm

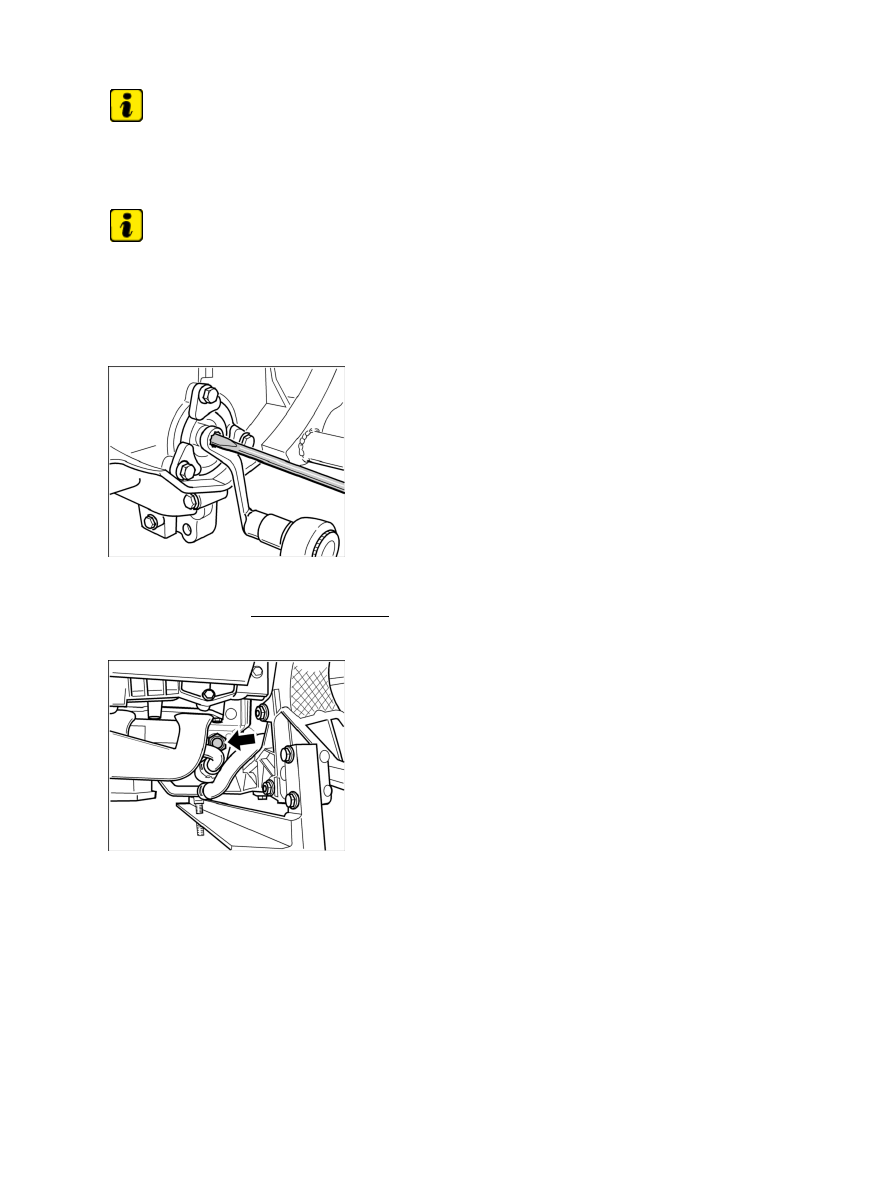
Collar nut for bearing cover

4. Position new M8 x 1 collar nut on the threaded pin of the intermediate shaft. Then tighten the nut

using special tool socket wrench 9110. At the same time, counter with a screwdriver in the slotted
threaded pin of the intermediate shaft. → Tightening torque: 12 (9 ftlb.) Nm +1 (0.5 ftlb.) Nm

Primary chain tensioner

5. Insert primary chain tensioner with new sealing ring (hexagon a/f 32) and tighten to the specified torque.

→ Tightening torque: 80 (59 ftlb.) Nm

Diagnostic system: reading out fault memory and activating systems

Installing bearing cover for intermediate shaft - up to engine number 685 09 790

433

Chain tensioner, cylinders 1 - 3

6. Insert chain tensioner for cylinder 1 - 3 with new sealing ring (hexagon a/f 32) and tighten to the

specified torque. → Tightening torque: 80 (59 ftlb.) Nm

7. Secure coolant pipe on cylinder side 4 - 6 with two M6 x 12 hexagon-head bolts. → Tightening torque:

10 (7.5 ftlb.) Nm

8. Fit new closure caps on cylinder head cover.

9. Pull locating pin out of the crankshaft vibration

balancer.

Installing bearing cover for intermediate shaft - from engine number 685 09
791

ATTENTION

Risk of damage due to particles of dirt.

Oil bores/oil ducts can become blocked up.

• 

→ When working on the engine, absolute cleanliness is essential.

→ Lay removed engine parts on a clean base and cover them without fail.

→ Use the cover for dust protection when fitting the engine NR.165 on the engine assembly support.

Note

The same sealing ring and installation/removal procedure applies as for the "old" bearing cover.

• 

The new bearing cover can only be retrofitted along with the new intermediate shaft up to model year
2002 (M96/03).

• 

Note

Replace collar nut M12 and coated M6 screws for bearing cover.

• 

Diagnostic system: reading out fault memory and activating systems

Installing bearing cover for intermediate shaft - from engine number 685 09 791

434

New bearing cover for intermediate shaft

Note

Always observe specified engine number range.

Note

Always observe specified engine number range.

New bearing cover.

B - Bearing cover 996.105.024.06

• 

C - Collar nut, M12 x 1.25

• 

Note

Clean working area of bore for bearing cover and crankcase thoroughly using acetone or solvent
naphtha.

• 

Note

Clean working area of bore for bearing cover and crankcase thoroughly using acetone or solvent
naphtha.

• 

1. Before installing the new bearing cover, check the fitted bore (axial attachment surface, bore chamfers) on

the crankcase for sharp edges and burrs. They should be removed with an oilstone or a polishing cloth.
Remove any existing residue and clean the bore with a clean cloth soaked in solvent naphtha or acetone.

Note

Replace bearing cover or sealing ring for bearing cover → 152355 Replacing sealing ring for
intermediate shaft.

• 

Note

Diagnostic system: reading out fault memory and activating systems

Installing bearing cover for intermediate shaft - from engine number 685 09 791

435

Replace bearing cover or sealing ring for bearing cover → 152355 Replacing sealing ring for
intermediate shaft.

• 

2. Grease fitted bore in crankcase and new bearing cover (with new sealing ring) with special grease

Optimoly MP3 (available from Porsche Parts Service) and place bearing cover in position.

Note

Replace collar nut M8 x 1 and coated M6 screws for bearing cover.

• 

3. Position three new, coated M6 x 20 screws on the crankcase and pull in the bearing cover by

screwing in the screws uniformly. Tighten the screws. → Tightening torque: 10 (7.5 ftlb.) Nm

Threaded joint with collar nut on bearing cover for intermediate shaft

4. Position new M12 x 1.25 collar nut on the threaded pin of the intermediate shaft. Then tighten the nut

using special tool assembly tool 9673/1. At the same time, counter with an angle screwdriver in the
slotted threaded pin of the intermediate shaft. → Tightening torque : 20 (15 ftlb.) Nm +/-1 (0.5 ftlb.) Nm

Primary chain tensioner

5. Insert primary chain tensioner with new sealing ring (hexagon a/f 32) and tighten to the specified torque.

→ Tightening torque: 80 (59 ftlb.) Nm

Diagnostic system: reading out fault memory and activating systems

Installing bearing cover for intermediate shaft - from engine number 685 09 791

436


Content   ..  67  68  69  70   ..